
How to Photograph the Northern Lights and Keep Warm Doing It
This article may contain affiliate links where I make a small commission for purchases you make from links that you click from this article. By purchasing through these links, you support me at no additional cost to you. Thanks for your support.
Northern Lights photography is not like other night photography; it has challenges that go way beyond normal night photography challenges – namely, the cold! You only get Northern Lights in the winter when you have those gorgeous dark skies. In addition, the aurora oval revolves around the geomagnetic north pole, placing you in some of the coldest environments on Earth. All of this means you are going to be waiting out in the cold for the perfect photograph of the northern lights.
If your dream is to photograph the northern lights, then you’ll need to be in the right place, have the right camera equipment, and be prepared with your camera settings. And you’ll want to ensure that you stay warm while you are working on your perfect photograph.
I have spent a lot of time photographing the northern lights in Alaska. I’ve even been lucky enough to see the southern lights on a cruise to Antarctica! From these experiences, I’ve accumulated an extensive list of tips for ensuring your aurora photography turns out great, you stay warm, and have fun. I’m excited to share these tips for shooting the Northern lights while staying cozy.
Table of Contents
What are the Northern Lights?
I’m no scientist – but I can tell you aurora borealis is a recipe made up of the sun, solar bursts, solar wind, the earth’s magnetic fields, and our atmosphere. If you want an in-depth explanation, check out this Northern Lights Defined article.
Indigenous Explanations of the Northern Lights
In addition to the scientific explanation, there are also Indigenous explanations. The Alaskan Native people and Inuit believe that the Northern Lights are the spirits of their ancestors hunting in the night sky, and that’s why they are active and moving.
Another version is the spirits of the ancestors watching over their loved ones on earth. The spirits are so friendly, it is said you can invite them for a ‘dance’. When you dance, they will join you in dancing, and you can essentially ‘dance them out’.
When I was told this, I wondered if the Hokie Pokie dance would work – it’s the only dance I know! At least if you choose to ‘dance them out’, it’s also a great way to stay warm simultaneously!
Where to Find the Northern Lights
You find the northern lights under the aurora oval. The oval thickness changes periodically, but in general, you’ll find the aurora oval around the Earth’s geomagnetic poles. You’ll also need clear skies in order to see the northern lights. This means that some of the best odds of seeing them are in places with clear skies.
My favorite place to photograph the aurora borealis is Fairbanks, Alaska. It’s in the Alaskan interior, which means clearer skies and a greater chance of seeing them. Plus, there are plenty of great things to do in Fairbanks (dog sledding and snowmobiling, in addition to chasing the Aurora!
Some other great places are:
- Yellowknife, Canada (Yukon)
- Churchill, Canada (Manitoba)
- Northern Norway
- Iceland
- Northern Finland
- Greenland
- Northern Sweden
Of course, you may be able to photograph them in Minnesota or Montana; however, the odds are much lower. I prefer to go to destinations under the aurora oval, where I have a favorable aurora forecast most of the time and good odds of clear skies for the best photography. That’s Alaska for me.

LET ME HELP YOU PLAN YOUR ALASKA VACATION
I’ve been traveling to Alaska for years now in various seasons, and I’d love to help you plan a trip that will get you off the beaten track and involved in more local experiences.
After two decades of wandering the globe, living nomadically, and sharing my stories on Ottsworld, I’ve learned one thing: travel isn’t just about the destinations—it’s about the transformation it brings.
Camera Equipment You’ll Need for Photographing the Northern Lights
There are a few extra things that you’ll need for night photography, and specifically northern lights pictures, that are different from a typical photography gear list.
Tripod
I never normally travel with a tripod, but in the case of night photography, it is a must. You’ll want a good, sturdy one that can deal with wind. Plus – make sure that it isn’t metal. Metal tripods can get incredibly cold, and you don’t want to touch freezing-cold metal, even with gloves. I use the Peak Design Travel Tripod, which is incredibly small but sturdy and fast to get into position!
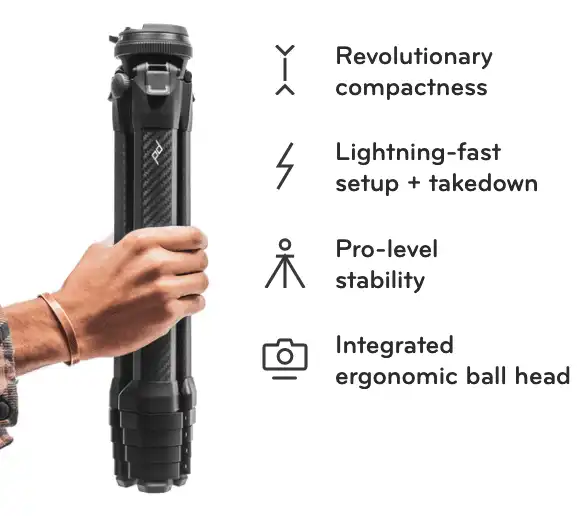
This is the smallest and sturdiest travel tripod I have found on the market. This is an aluminum version (3.4 lbs) - but they also have carbon fiber (2.8 lbs). A travel tripod that packs down to the diameter of a water bottle—without compromising height, stability, or features. Plus, it's so easy and fast to setup and take down!
Wide Angle Fast Lens
Any lens will work, but the wider the lens, the better. Northern Lights can take up a big area of sky, and you want to capture as much of the show as possible, in addition to the foreground. In fact, if you are doing northern light photography underneath the Aurora oval, the Aurora will normally show up arcing across the sky like a rainbow. To capture that entire shot, you will need a wide-angle lens.
When in Fairbanks, Alaska, photographing the aurora borealis, I shot with a 10mm or 18mm lens most of the time. Generally, a focal length of 14 to 30mm is what you should aim for. Fairbanks is normally directly underneath the aurora oval, so it’s nice to be able to get a big, wide view of how high in the sky the lights climb. However, a 24 mm also works, but you’ll likely not get the full arc of the northern lights. Just be aware that a 10mm lens tends to distort things in the foreground.

In addition, the faster (lowest F stop number, such as f1.8 or f2.8) lens you can use, the better. This allows you to work with more light – something that is in short supply during night photography. Without a fast lens, exposures will need to be longer, and that will tend to blur the aurora more. My fastest, widest lens only went to f4, and I could still shoot at shutters of 10 seconds without too much of a problem. Use what you have, of course – because anything is better than nothing!
Discover the best camera bag for travel – organized by travel style
Rent a Lens for Aurora Photography
If you don’t have a wide-angle, fast lens, don’t fear – you don’t need to go out and spend thousands of dollars on a lens just for northern lights photography. Instead, you can rent a great lens for Aurora photography.
I have rented from both Borrow Lenses in the past. I rented the Zeiss Batis 18mm f/2 for Sony E-mount for ten days, costing approximately $120. This includes shipping. I didn’t get the insurance, though, as I have other travel insurance that will cover it. Side note – I always feel like the insurance is a sham on these things. Before purchasing the insurance out of fear, first check to see if any of your other insurance (home, travel, credit card) will cover the lens.
This was a great lens with high-quality glass for capturing the northern lights. You can obviously get something even better, like the Sigma 14mm f/1.8 Art E Mount. That’s the great thing about Borrow Lenses – you can try out a lens before you buy it.
Camera
I use a Sony A7iii mirrorless camera. Not too long ago, I switched to mirrorless from my Canon DSLR system. The main thing to look for in a camera used to photograph the northern lights is low-light performance (higher ISO). An ISO range of 100-51200 is ideal. In addition, battery life and weather sealing are also important, as they are essential for the long and cold nights under the Northern Lights.

A manual mode camera is required for Northern Lights photography. You must be able to control f-stop, shutter speeds, and ISO, each manually – more on the settings for northern lights below. Full-frame cameras will also produce a better-quality image.
Red Light Head Lamp
Not only will you need some sort of light to light up the camera controls and adjust your camera, but you’ll also want a powerful light to help you light up the foreground, check your focus, and make your Northern Lights photography even more picturesque.
It takes about 20-30 minutes for your eyes to fully adapt when doing photography at night. A red light is non-glaring, so it can help you see better at night. Turn on a white light and ruin your dark adaptation and that of everyone around you. Because of that, white flashlights and cell phone lights are discouraged when viewing northern lights.

Waterproof and Dimmable for Camping, Hiking, Running. It also has a Red Light Headlamp Mode which is great for night photography or star gazing. Settings include full strength in proximity and distance modes, dimming, strobe, red, green and blue night-vision, and lock mode
Remote Shutter Release
This isn’t required, but many people use remote shutter releases for night photography to reduce any possibility of camera shake when you physically hit the shutter button. Some remote releases have additional options like an intervalometer, a lightning trigger, and remote control of camera settings.
Extra Batteries
In cold weather, battery life goes fast. Make sure you always have extra batteries when you are chasing the northern lights. Take more than you think you’ll need! In Fairbanks, I was often shooting in -10 to -20, and our camera battery life was minimal.
My rule is to bring double the number of batteries than what you think you may need. I had 5 with me, and there were nights when I practically went through all of them.

Hand Warmers
Yes – these are great to have to keep your hands warm – but even more importantly, they are great to keep your extra camera batteries warm. The cold will sap your batteries even if they aren’t in your camera, so hand warmers are really helpful when you photograph the northern lights. Goodbye to disposable hand warmers, technology is making you extinct! I really love the new electric handwarmers that can be simply recharged with USB and used over and over again. The technology for these is getting better all the time!

Designed with a 2-in-1 split function, these rechargeable hand warmers can be used separately or snapped together magnetically for dual-sided heating and convenient storage. Strong magnets ensure the 2-pack hand warmers stay connected, reducing the chance of loss. Ergonomically contoured to fit your palm naturally, deliver gentle, even warmth to your palm and fingertips, keeping your hands cozy and comfortable during cold weather.
Northern Lights Photography Tips
You’ve got all your gear, but these tips are essential for the unique environment your camera gear will face when out in the freezing cold!
Once Your Camera is Outside, Leave It Outside
This is the first thing to know and follow religiously. Your body can go in and out of the cold with little dire impact besides being uncomfortable; however, your camera cannot. Don’t subject it to the massive temperature swings outside and inside, as it leads to condensation inside your camera, not to mention it’s just damn tough on the camera in general.
Set your camera up on the tripod, situate it outside in the area where you want to shoot, and then leave it there until you are done shooting completely for the night. You’ll have to acclimate when you come back outside, but your camera won’t, and that will ensure you can get the Northern Lights photography you are hoping for.
Pro Tip: “If you must take your camera inside from the cold, place it back in your camera bag or backpack before you go back into the warm area. Keep it in the closed bag, which is filled with the same cold air that surrounds your camera outside, until you go back outside. This will prevent condensation. If you stay inside for a long period of time, eventually, it will warm up gradually, and everything will be fine. If you do experience condensation, your only remedy is to keep the camera in a relatively warm, dry room until it completely dries out. Only then can you take it outside again.” – Dan Bailey, Alaska Photographer

Take Your Batteries Out of Your Camera
But wait! Before you just leave your camera sitting outside on the tripod, take the batteries out of it and take them inside with you. If you leave them in the camera outside, they will most definitely drain and be of no use to you.
Batteries Can Come Back to Life
Often, cold batteries are just a big tease. They tell you they are empty, but really they aren’t. Just warm them up again in an inside pocket close to your body. Or better yet, put them in a pocket with hand warmers to get them nice and toasty again. Suddenly, you’ll find that they come back to life. When you put them back in your camera, it will show that they aren’t empty. See…a giant battery tease.
Point the Lens Downward
Hold on! I know, I know, you have left your camera sitting on the tripod with the batteries taken out and stored safely in your warm pocket – great. But there is one more key thing to do before you go have that hot toddy inside. Adjust your tripod head and point the lens down towards the ground. This will ensure the glass on the lens doesn’t get frosted over.
I learned this awesome tip from Frank at the Aurora Bear Photography Workshop. On the coldest night we were shooting (around -15F), I left my camera pointing down toward the snow on my tripod as I waited in a yurt, trying to warm up. When I returned to look for Aurora periodically, I noticed my whole camera was frosted over! However, the lens pointing at the ground was not. This way, when the aurora came out suddenly, I was ready! I just popped the battery back in, readjusted the tripod head, and got my shots even though my camera was completely frosty!
Remove Your Filters
Frank at Aurora Bear also taught me to remove the filters on my lenses, as they can produce a series of dark concentric circles in the center of your photo. Plus, some filters will also reduce your available light. You are already challenged with low-light conditions when shooting the Northern Lights; don’t make it worse!
Pro tip: “Also, watch bare noses on ice-cold metal and plastic camera bodies. If it’s cold enough, you can easily frost-nip the end of your nose when you press your face up to the camera to take photos. I know because I’ve done it. Either try to hold your face slightly away from the back of the camera, or else use some kind of nose shield or face mask. Your skin will thank you.” Alaska photographer Dan Bailey
Protect Your Equipment from the Subzero Temperature
At -15F, you don’t want any bare skin to touch the metal lens – the lens is way too cold to handle. I use LensCoat LensCovers for my lenses. LensCoat lens covers are made of Neoprene and fit snugly around the lens. They protect lenses from bumps and scratches, as well as make them easier to hold on to when it’s freezing outside! This made them perfect for northern lights photography.
You can also get tripod leg covers, which are recommended for cold weather; no one wants to grab onto a below-freezing tripod leg!

LensCoat® lens covers offers your valuable equipment some protection from scrapes and bumps, preserving its resale value. It also help break up the shape of your lens, making it less noticeable to wildlife. Get 10% off with promo code SHERRYOTT

LegCoat® Wraps are made from soft neoprene are designed to wrap around the upper leg of your tripod and are easily affixed with a Velcro closure. The Wraps backing is designed to tightly grip to your tripod legs so they will not slide. The covers act as a thermal barrier making the tripod more comfortable to handle in hot or cold conditions.
LET ME HELP YOU PLAN YOUR ALASKA VACATION
I’ve been traveling to Alaska for years now in various seasons, and I’d love to help you plan a trip that will get you off the beaten track and involved in more local experiences.
After two decades of wandering the globe, living nomadically, and sharing my stories on Ottsworld, I’ve learned one thing: travel isn’t just about the destinations—it’s about the transformation it brings.
How to Stay Warm While Photographing Northern Lights
You have to be prepared for cold-weather photography, or else you will be miserable, AND you may lose your opportunity to get photos of this spectacular event.

One of the coldest activities to do in the winter is photographing the aurora. This is mainly because you spend a lot of time standing and sitting still, waiting, which is the recipe for getting cold really fast. I do a lot of snowshoeing and snowmobiling as outdoor winter activities, and I seldom get cold because my body produces heat and uses energy. Therefore, here are the items I recommend for staying warm while waiting for the Northern Lights to appear!
Warm Photography Mittens
For me, one of the most challenging things about northern lights photography is keeping my hands warm while changing camera settings. There is often a lot of trial and error involved in capturing the northern lights; you are always fiddling with the buttons and settings. And that means cold fingers. I use the Heat Company Gloves for cold-weather photography. I like them because you can easily fold back the top of the mitten to get to the camera buttons and then quickly fold the top of the mitten back on your fingers to minimize heat loss.

Waterproof, Windproof, Leather Palm, Touchscreen Compatible, Insulated
Team these photography gloves up with the electric hand warmers I discussed above, and you’ll stay warm!
However, the electric heat technology doesn’t have to be separate handwarmers; some gloves come with heat! The technology in heated garments is really moving fast! In fact, one of the best heated gloves on the market is the Gordini Heated Gloves. They are pretty smart gloves – they can thermoregulate themselves! You can set the temperature you want them to maintain via a phone app!

These are one smart glove...hence the hefty price tag. They can measure the current heat of your hands in your glove like a thermostat and then deliver just the right amount of heat to keep you warm! Heat turns on when you’re cold and off when you’re not. Set your heated gloves to a comfortable setting using a paired smartphone app and automatically the heating system maintains a steady and comfortable balance point.
Check out my winter packing list for extreme temperatures
Cold Weather Jacket
A heavy parka is recommended for aurora photography. Or you can layer a wind jacket with a puffy jacket. I prefer longer coats, though, like parkas, for being out in the middle of the night. You can also try a heated underlayer. Heated products have really come a long way in the past few years. They are much more affordable, and the heat functionality is always improving each year.
The North FaceWomen's Jump Down Parka provides winter protection from the top of your head to your knees. This cold-weather coat features waterproof DryVent fabric and 550-fill down insulation. Not once was I cold in Alaska in this parka!

From Gobi Heat - 10 hrs of Heat | 3 Heat Zones | with Battery & Charger | Machine Washable | All Day Warmth. Great for a layer under your favorite winter coat.
Socks and Boots
Standing out in the snow for long periods of time doing photography means inevitably cold toes. You can use the disposable toe warmers; however, I have found that the electric socks are really great alternatives too! Granted – they are more of an investment – but they are great for any cold-weather activity like skiing or snowshoeing. I used the Gobi heated socks on my last trip and was really happy with them.

Out of all of the heated products out there, I find these merino wool socks work the best. Heat between the toes radiates around your foot, providing up to 11 hours of heat. Use the mobile app to effortlessly manage heat level and see battery life. The contoured battery fits your calf snugly.
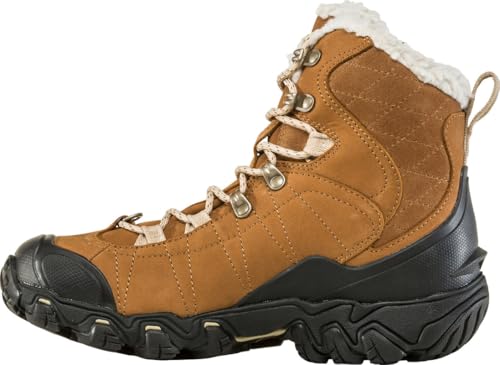
Sooo - comfortable and warm! These are my go-to winter insultated boot. I use them for snowshoeing and everyday around town stuff when it's really cold. O Fit Thermal insoles provide stability and support while reducing heat loss to keep your feet happy!
Other Gear to Stay Warm Chasing Aurora
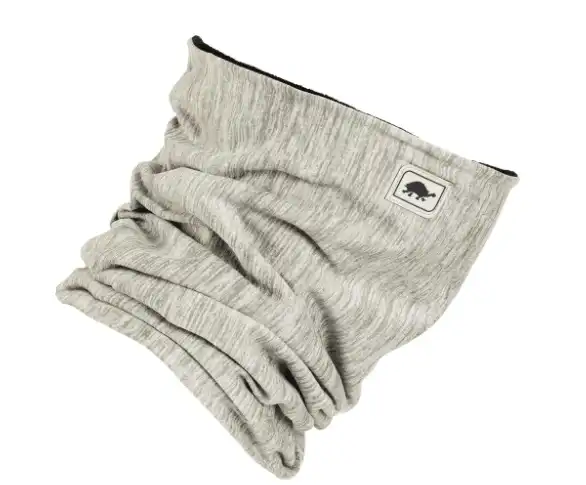
Turtle Fur is known for their neck gaters. They have lots of styles and fabrics. The winter fleece lined is my favorite for cold weather. It's so soft and cozy!

OMG - I love this for really cold weather! The mask is secured by a magnet and it's easy to pull...

These Nepali hat are my favorite for cold weather!
- 100% Wool Hand Wash Only
- 100 % New Zealand Wool Fleece Lining. (Itch free)
- ❤ Fair Trade and handmade in Nepal. Hand knit one at a time, not mass produced so there may be minor differences in color and imperfections.
Improve the Overall Experience of Your Northern Lights Photography Outing
Have a Place to Wait Inside
The Northern Lights are unpredictable, and warmth is essential in Fairbanks as you wait. If you can do a Northern Lights trip that has an indoor option where you can wait inside, this is much preferred. And if it has food and drink…even better! If you are simply waiting in a car, just make sure you have enough gas and keep the car running and the heat on!

Bring Some Hot Drinks
There’s nothing better than a piping hot mug of hot chocolate while you wait for the aurora forecast to improve! Many Northern Lights tours will have things like hot chocolate, tea, coffee, and instant ramen to keep your insides warm. Or if you go on your own, be sure to bring a thermos of hot drinks.
Embrace a Full Moon
Contrary to popular opinion, the full moon can light up your northern lights scene perfectly.
It’s important to note a full moon doesn’t obscure the light of the aurora, in fact, the bright moon often enhances the contrast between the scenery, snow, and the aurora providing a nice natural light in the foreground.

Know Your Directions
After talking with physicist Peter Delemere at the Geophysical Institute in Fairbanks, we learned that when you are armed with a little knowledge, you can have a better experience. Peter suggested knowing your directions (N/S/E/W) and knowing where the aurora oval is, so you are looking in the right direction. In Fairbanks, the aurora oval normally sits just to the north. So when you get to your shooting location, set up your gear pointing north and watch the northern horizon for the first signs of the aurora.
Take an Aurora Photo Workshop

Of course, the fastest and easiest way to improve your Northern Lights photography is to take a workshop the first night you go out! We went to Aurora Bear Photography Workshop and had a one-on-one experience with Frank Stelges, who set us up for our future nights of aurora chasing!
Best Camera Settings for Northern Lights Photography
I have a little checklist I keep on my Evernote phone app so I can always refer to it. All you have to do is make sure you have all the camera gear I mentioned above, and just follow these steps to great aurora photography!
1. Turn on Manual Mode
That’s right…Northern Lights photography means it’s necessary to get out of auto. No auto exposures, no autofocus, no auto ISO. This is where the rubber hits the road in photography, and you will have to understand manual settings.
If you are currently wondering what manual settings are, then I suggest you take a class BEFORE your Northern Lights trip so you know how to use your camera’s manual settings, how to adjust them, and why.
2. Turn on Manual Focus
Sadly, your camera, no matter how fancy it is, cannot auto-focus in the dark. It’s manual all the way, baby!
3. Set Focus to Infinity
If you don’t have an infinity setting, then you’ll want to potentially take your camera out in the daylight and focus it on the most distant object you can see, and make a mark on your camera as to what that focus spot is. Or leave it out there and don’t touch it. But honestly, most DSLRs and lenses have infinite settings these days. They aren’t all perfect, though, so it still may be a little trial and error.
4. Turn Off Auto ISO
Start with a setting around 1600 and adjust from there. Don’t be discouraged if you have to change it a lot before you are happy with it.

5. Turn on Your Camera Timer
If you don’t have a remote shutter release, then turn on the timer. I normally have a 10-second timer set for night sky photography. This way, you can press the shutter and watch the countdown while your camera is still.
6. Set Aperture
My rule of thumb is to set your aperture to the lowest f-stop number you can get to on your lens.
7. Shutter Speed
This is one to play around with, depending on what other light sources are around you, including moonlight. Longer exposures will result in brighter images, but stars will streak, and the aurora will soften. Short exposures may have sharper details, but dimmer images require more post-processing. Start at 15 seconds and adjust. If you want super sharp stars, though, then you will want to play around with your other settings (like ISO) to have a slower shutter, like 8 seconds.
8. Focal Length
Zoom out to the widest you can on your lens – this ensures you will capture all of that beautiful display in the sky.

You and your camera are now prepared to capture the northern lights! However, the last ingredient you need for aurora viewing is patience. Northern lights are never guaranteed, but you can always choose to ‘dance them out.’ Work on your best hokey-pokey and wait for the northern lights to appear and dance with you!


Disclosure:
I was a guest of Explore Fairbanks on this trip however all opinions expressed here are my own.
This post contains some affiliate links. If you choose to purchase items through these links, I will earn a small commission at no extra cost to you. These commissions help reduce the costs of running this site


I lived in NW Ontario for a few years in the 90s. There were a few times that we were out late a night that the Northern lights were so bright and active (dancing) that I was sure you could actually hear them. For some reason I never attempted to shoot them (film days, of course) but I had a friend who captured some. Thanks for all the photography tips. 🙂
I hope you get to see AND Photograph them one day again soon Marylou!
Love your stories on the northern lights. Hope to see them someday. Excellent tips that I hadn’t thought of. I will use them in future travels. Thanks.
Thanks Jim! I hope you get to see the lights one day soon! And I hope you consider Alaska as a great place to view them. This was really the first time that I had a really positive experience with them and I learned so much!
Alaska is really a great place for seeing northern lights. My experience was great in alaska. Blog is very nice. Thanks for sharing.
woo man what a beautiful picture really I loved it, man, Alaska is really a great place for seeing northern lights thanks for sharing, I am also a photographer in UK
My family is trekking to Fairbanks in March 2021. I know this article was posted awhile ago but as a cell phone photagrapher hoping to at least make a novice attempt at learning how to use the right equipment in the right way to catch whatever we may see this article is enlightening. Not only is it packed with detailed, practical information it is shared in a way that is understandable to the layman. Adding the little tips that only an experienced person would know like the metal tripod legs or the frost on the lens, wonderful. I know the information will be priceless and the confidence boost of getting practical inside tips is the cherry on top. Thanks so much. Can’t wait to practice, prepare and pounce!
-Suzanne
Seattle, WA
Have a great trip Suzanne!!
Capturing the Northern Lights is truly a magical experience, but as you rightly point out, it’s not without its challenges, especially the cold! Your tips are spot-on, especially about choosing the right equipment and staying warm. I’ve always been fascinated by the intersection of natural beauty and technical skill required for aurora photography. Alaska, with its clear skies and stunning landscapes, seems like the perfect backdrop for such a celestial spectacle. Thanks for sharing your insights—I’m inspired to plan my own aurora adventure soon!