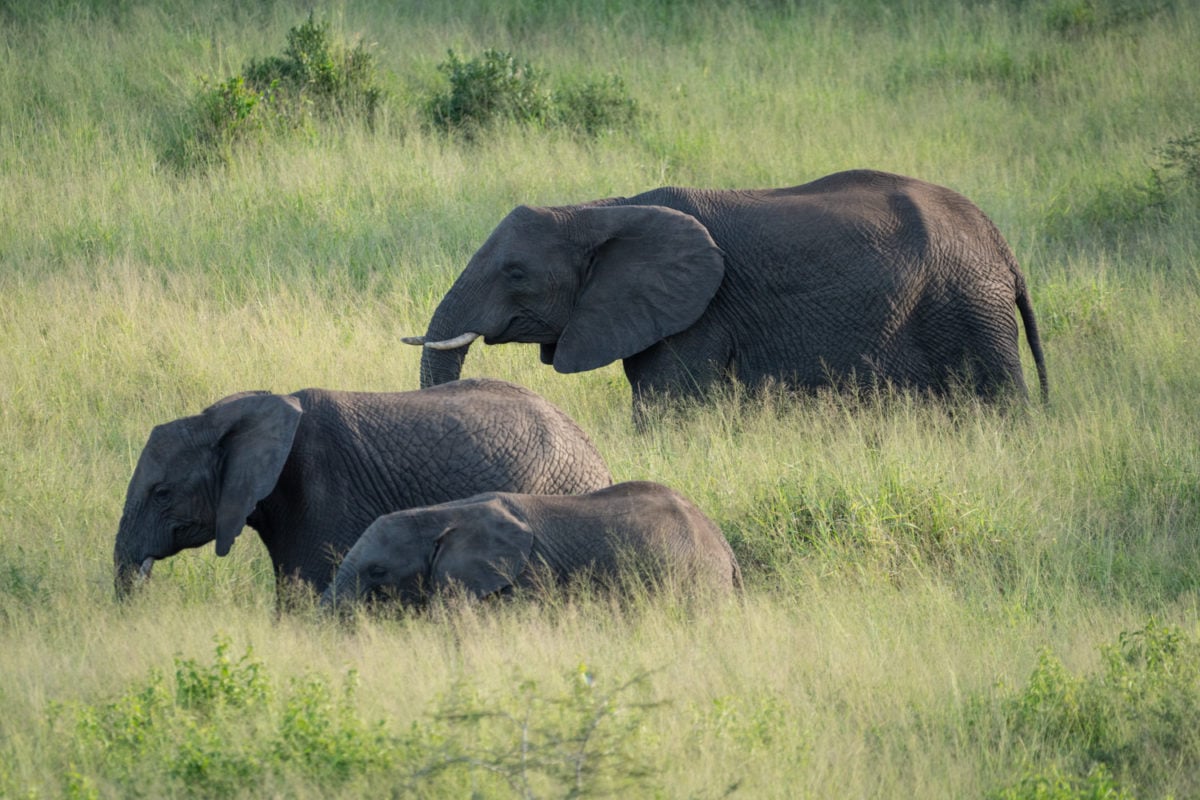
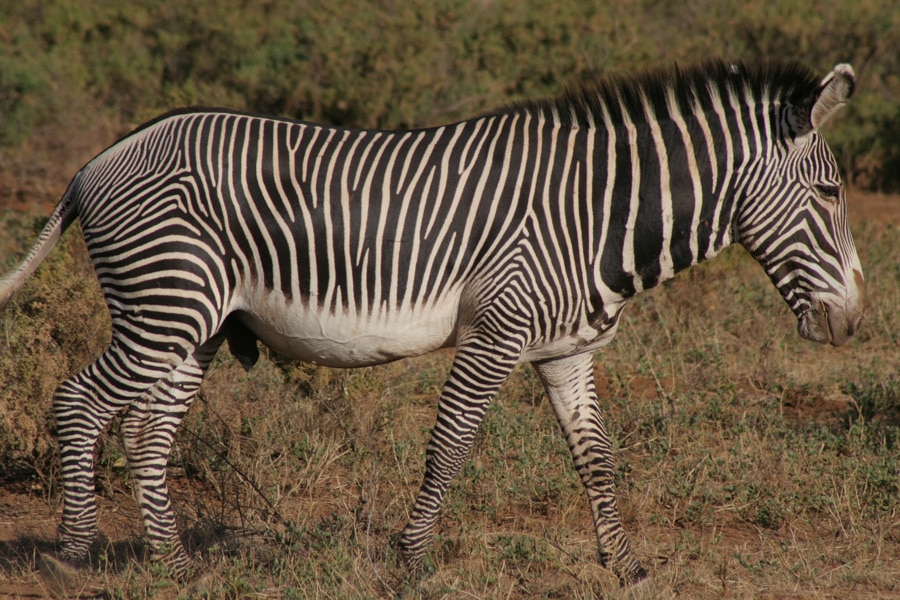
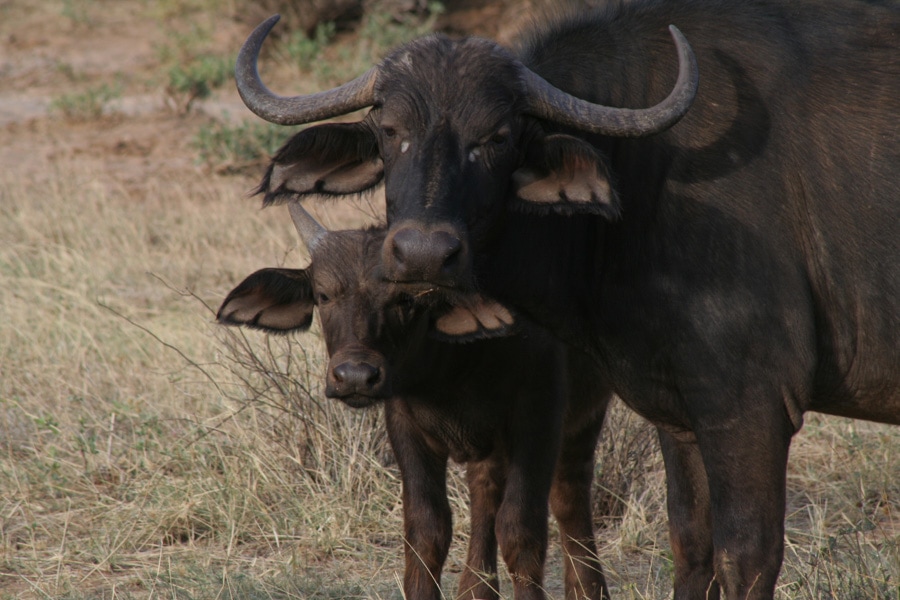
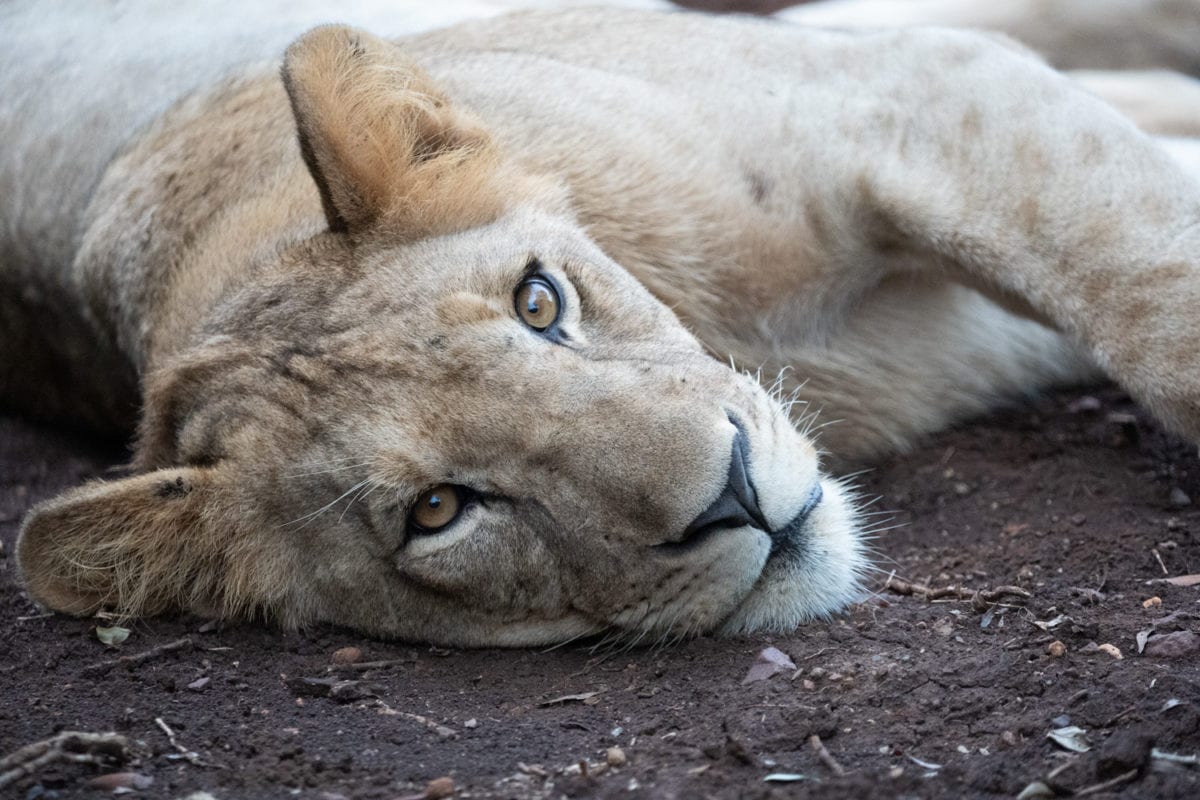
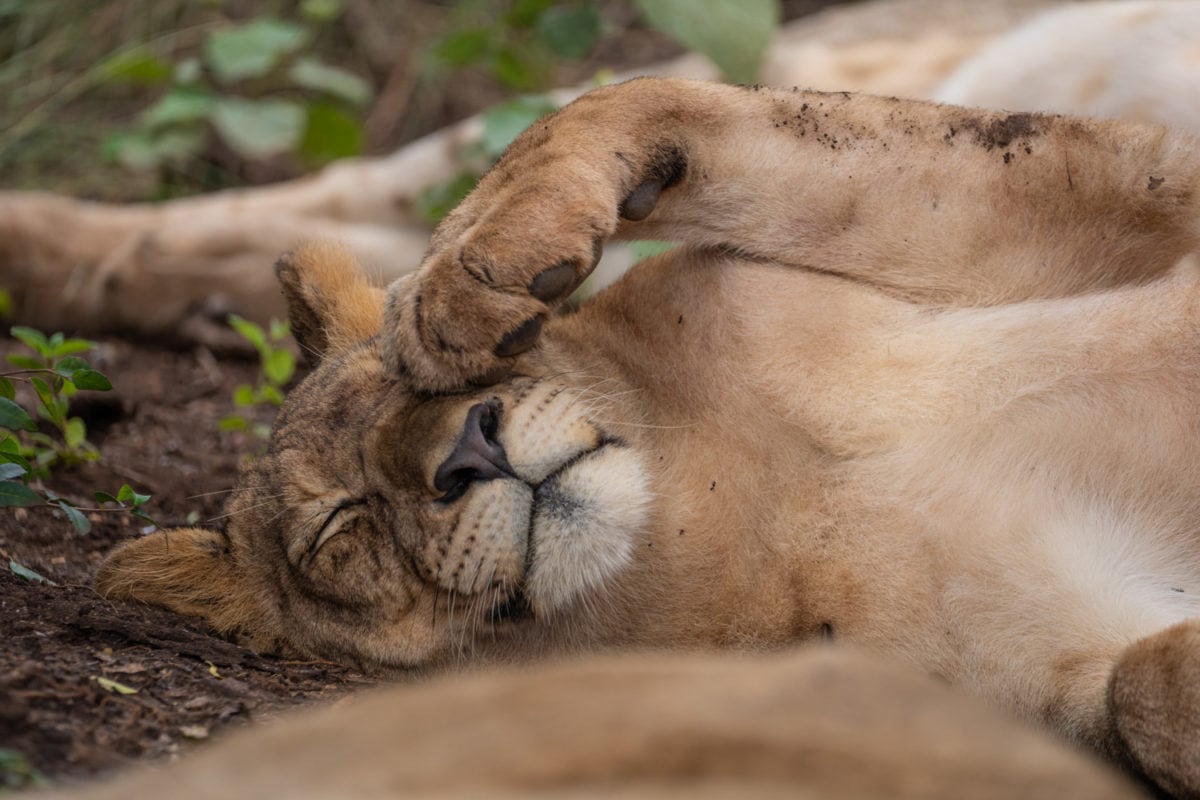
I was on my knees, trying to get as low as I could possibly go and still remain safely in the vehicle. Every time one of the lions turned and looked at me right in the eyes, my heart skipped a beat. It’s an eerie feeling when you lock eyes with a lion.
I put my nerves at bay and looked through the viewfinder, and gently pushed down on the shutter button. My camera let off a whir of noise taking 10 frames per second capturing every possible movement the lion made. There was a moment of excitement following by a moment of remorse when I thought about the thousands of images I would have to edit after this Safari!
However, one of Christian’s basic rules in safari photography was to take a lot of exposures of each object – he encouraged us to waste space. It’s good beginning photography advice – just shoot and get used to the gear and settings.
For most of my travel writing career I’ve focused more on landscape and candid/editorial photography. I have steadily improved from taking tons of photos to knowing now when I have the photo I need and moving on; cutting down my editing time. However, wildlife photography isn’t my strong suit; it’s still rather new to me. But this trip really allowed me to get in some great experience using a longer lens and concentrating on wildlife!
TABLE OF CONTENTS:
Safari Photography Challenges
Tips for Taking Home Great Safari Photos
Photo Workshops and Tours
The Ultimate Photo Safari Vehicle
Have a Photographer Drive the Vehicle
Rent the Expensive Equipment
Use a Phone Camera Sometimes
How to Frame Your Shot
Camera Settings To Use
Shoot on Silent Mode
Photography Gear I Use on Safari
Table of Contents
Safari Photography Challenges
Because of the rough setting and danger of wildlife safari’s, it poses some unique photography challenges.
Mixed Goals
If people in the vehicle have mixed goals it’s hard to do great photography. Safaris are normally done by off-road vehicle with a group of people who are staying at the resort/lodge. That means that everyone in the vehicle likely has different goals for the safari – and not all of them include photography. It’s hard when you want to take time and get great safari photography when other people just want to see as many animals as possible. Or maybe you have people who all want to take pictures – but some people are just happy shooting with their phone. Phones and telephoto lenses don’t mix in the same vehicle!
You Are Not in Control
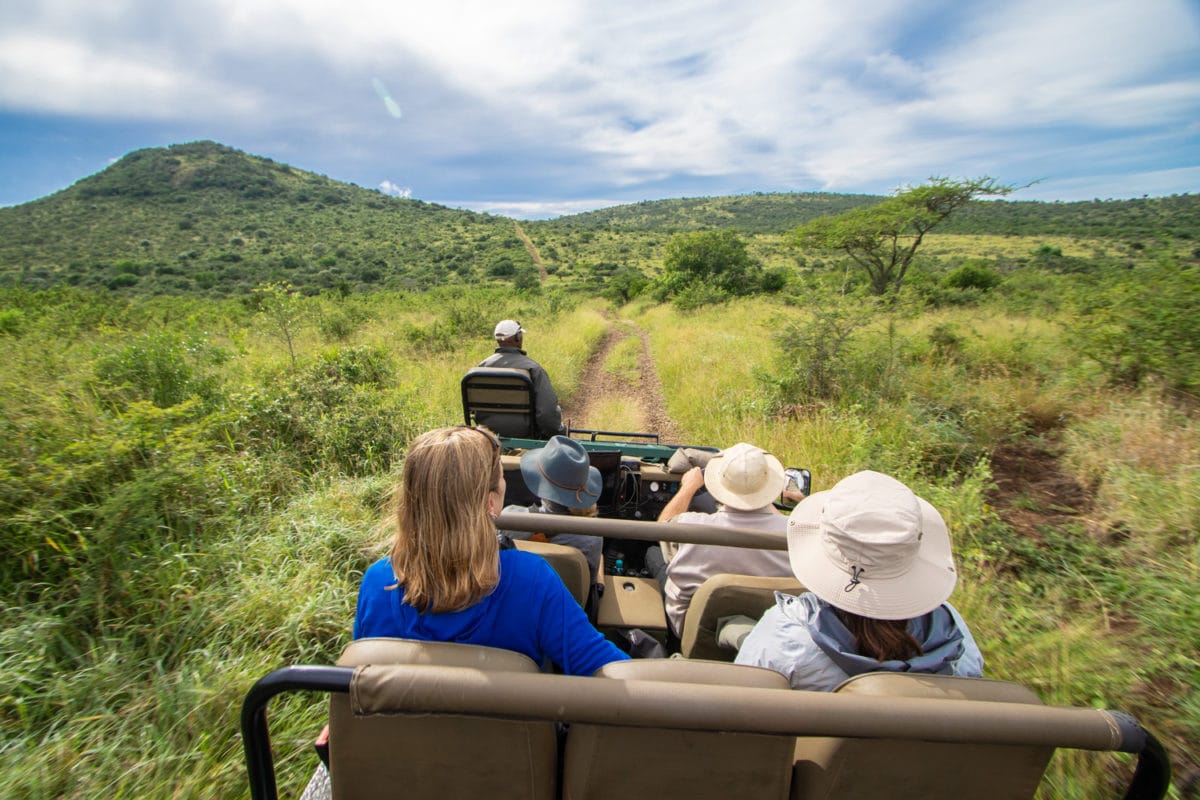
I’m normally used to walking around and trying different perspectives so I can get the composition and lighting I want in landscape photography. However in safari photography you must be in a vehicle for the game drive, that means you are at the mercy of the driver to get you in the position you want to shoot. You have little control of your composition. This sort of comes back to first issue – if you don’t all have the same goals, then this becomes even harder.
Shooting with lighting in mind is pretty important – it can be the different between a good shot and a mediocre one. Once again, in a group safari situation you generally don’t have a lot of control over your position in relation to the sun since someone else is doing the driving.
Expensive Equipment
Normally wildlife photography requires some pretty specialized equipment; big lenses, and DSLR cameras with sophisticated focus. My last safari I went on I had a 300mm lens, and honestly it wasn’t long enough for what I wanted to accomplish. Wildlife photography equipment is pretty expensive, and if you don’t have the right equipment, you likely will be challenged to get the photos you want.
Tips For Taking Home Great Safari Photos
Photo Workshop and Tours
One way to resolve that issue of people in the same vehicle with different goals is to make sure that you are only on safari with photographers. If you can’t splurge on a special photography safari workshop, then pick a safari that has a full time photographer on staff. Thanda Safari employs a full time professional photographer, Christian Sperka Photography, that offers each guest an 90 minute safari photography tutorial as part of your stay. During the lesson, Christian teaches you how to set up your digital camera or smartphone, introduce you to the basic rules of wildlife photography and the art of motion photography. In addition, you can go further and hire him as a guide for a photo tour to do more in-the-field instruction in his special photography-based vehicle (the Green Mamba).
What is the difference between a photo workshop and a photo tour?
Meet the Green Mamba – the Ultimate Safari Photography Vehicle
Christian had a dream to create the ultimate photo safari vehicle and he made that dream come to life! He converted a Land Rover Defender to take two photographers, with an additional three guests, in ultimate photo comfort.
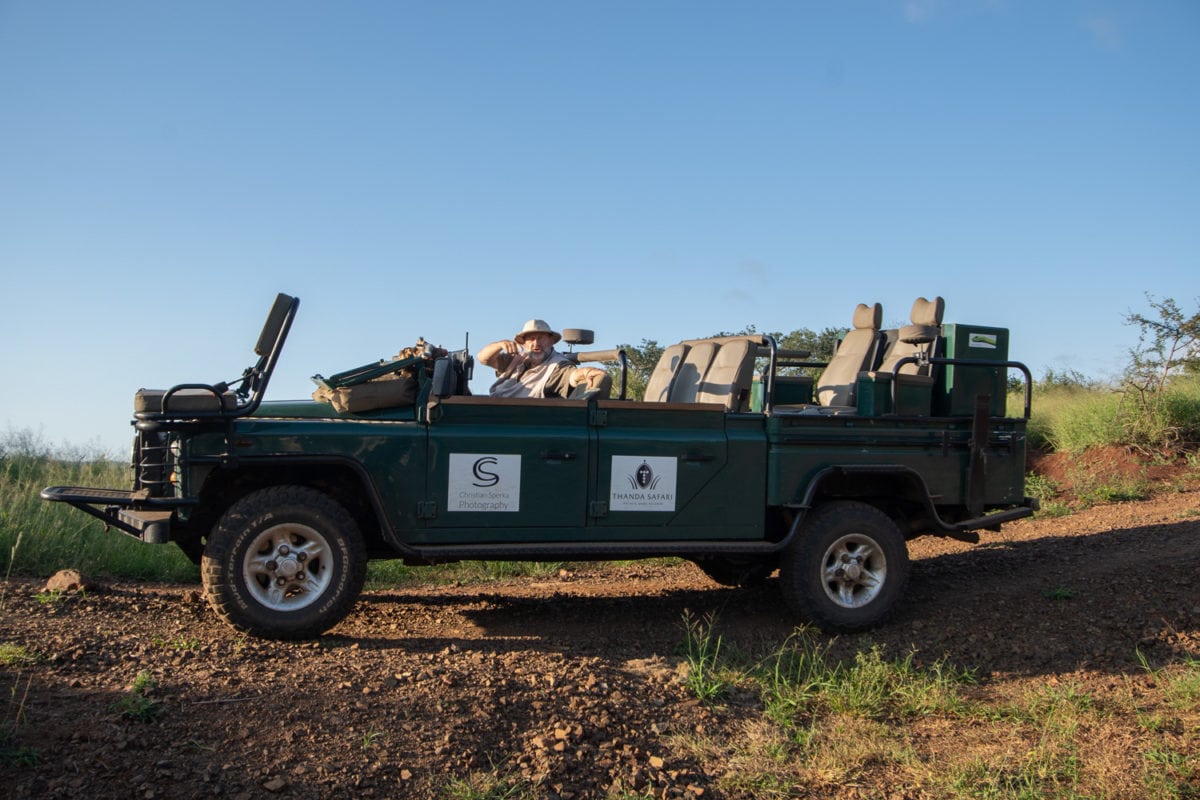
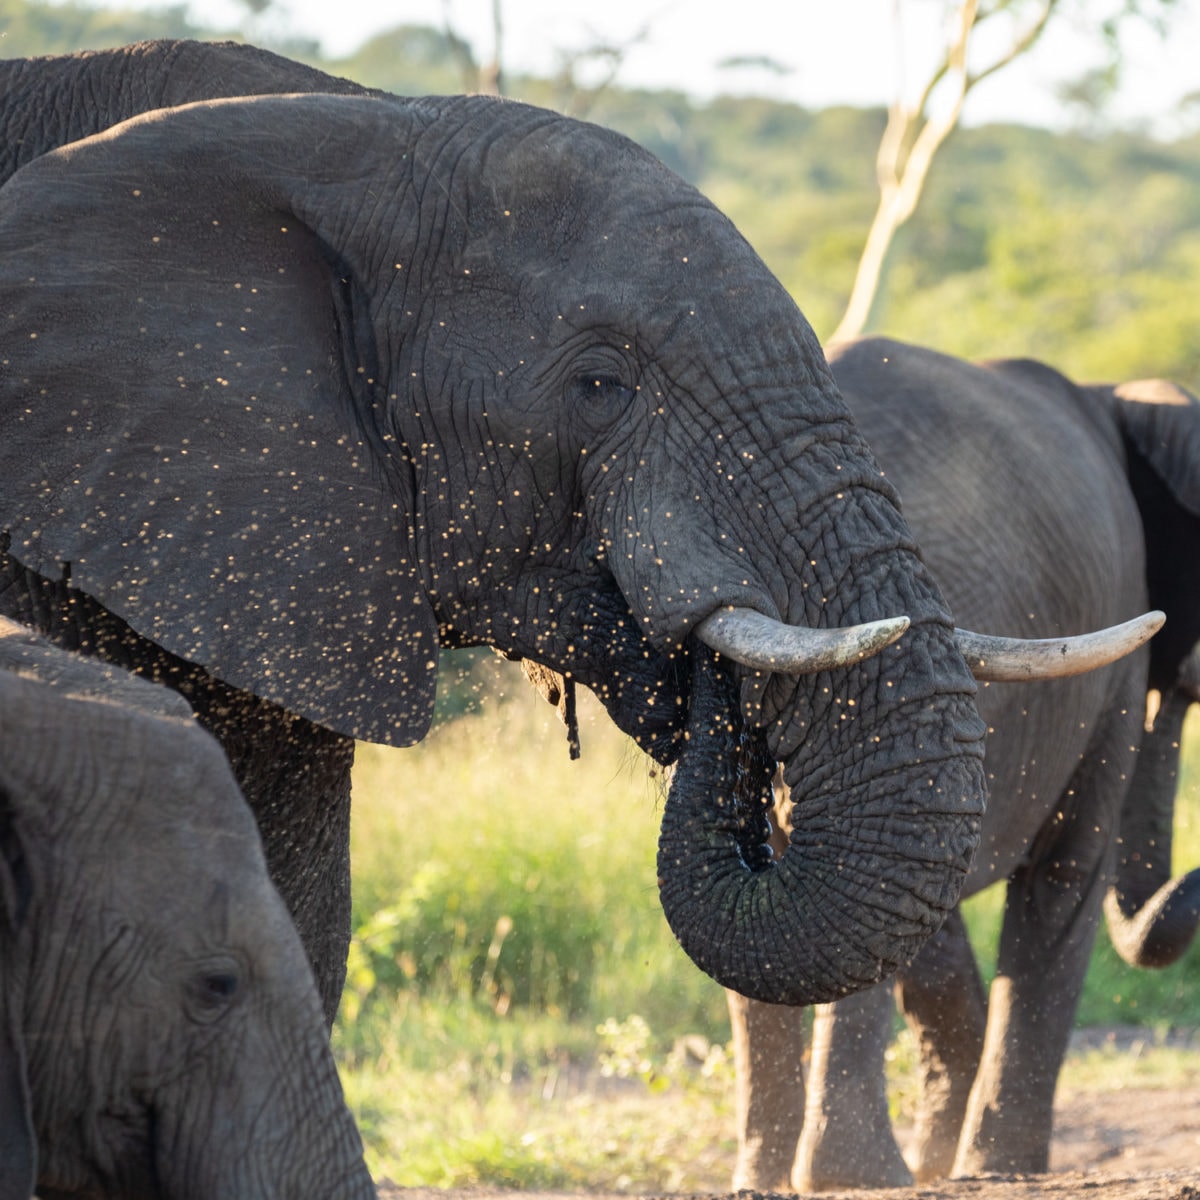
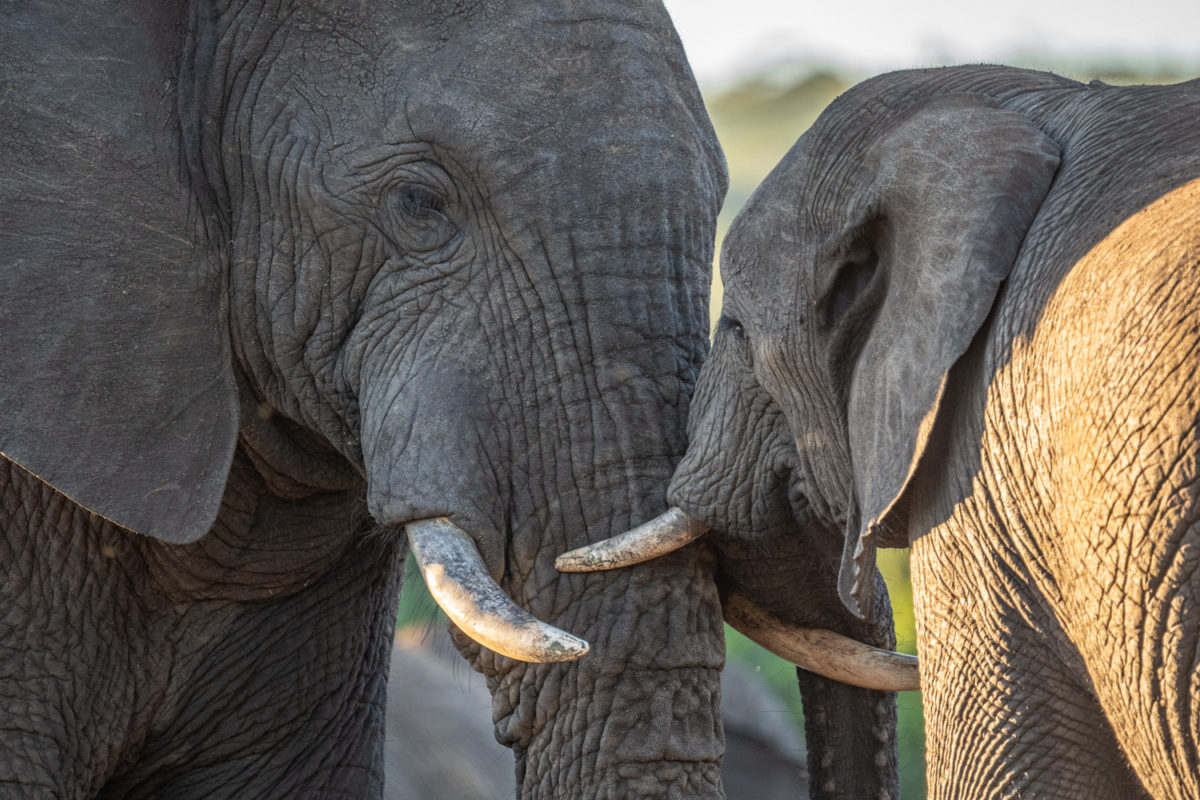
Getting as low as you can is important in wildlife photography, so Christian took a typical safari vehicle with 3 rows of seats and removed a row to give much more room for photographers in the back. He then put thick padding on the floor making it comfortable to get on your knees and crouch down in the back seat to get the beautiful shot of an animal at eye level.
In addition, there are padded and moveable arms in the back where you can rest your camera for steady shooting which is really important when you are using a big lens! This is one time you don’t want to ride shotgun!
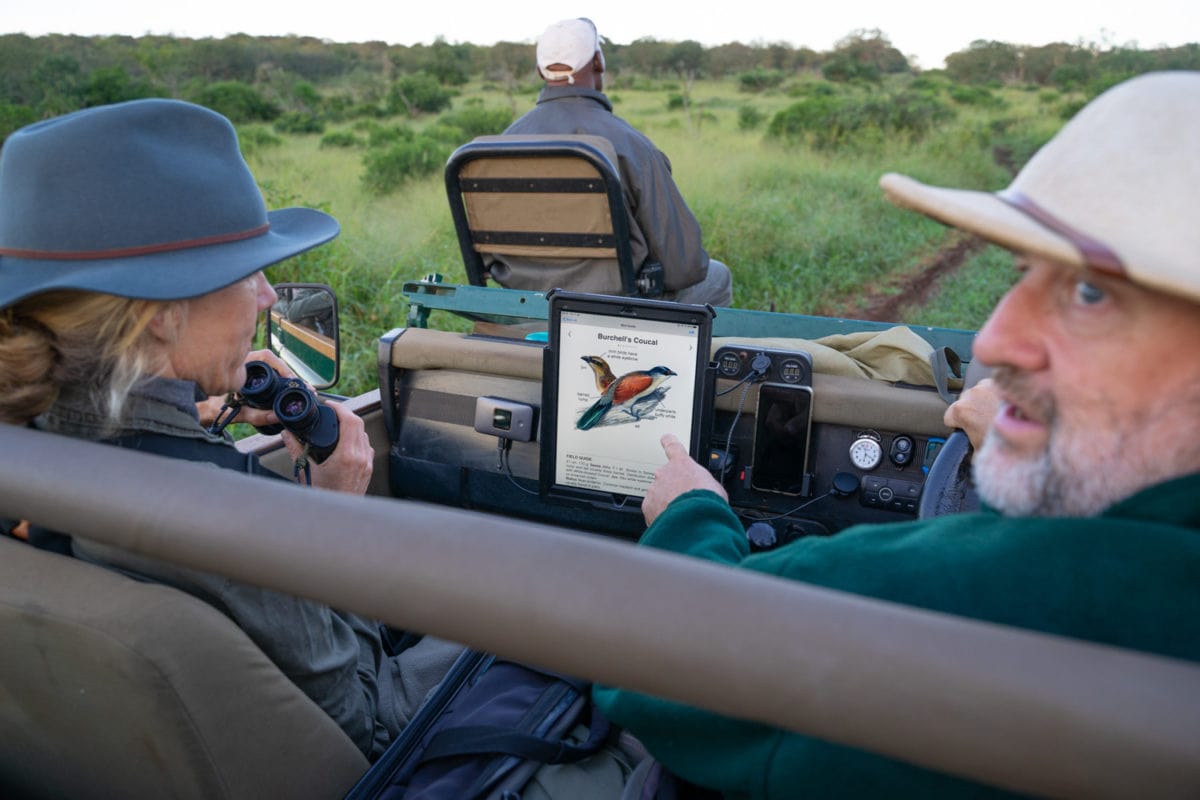
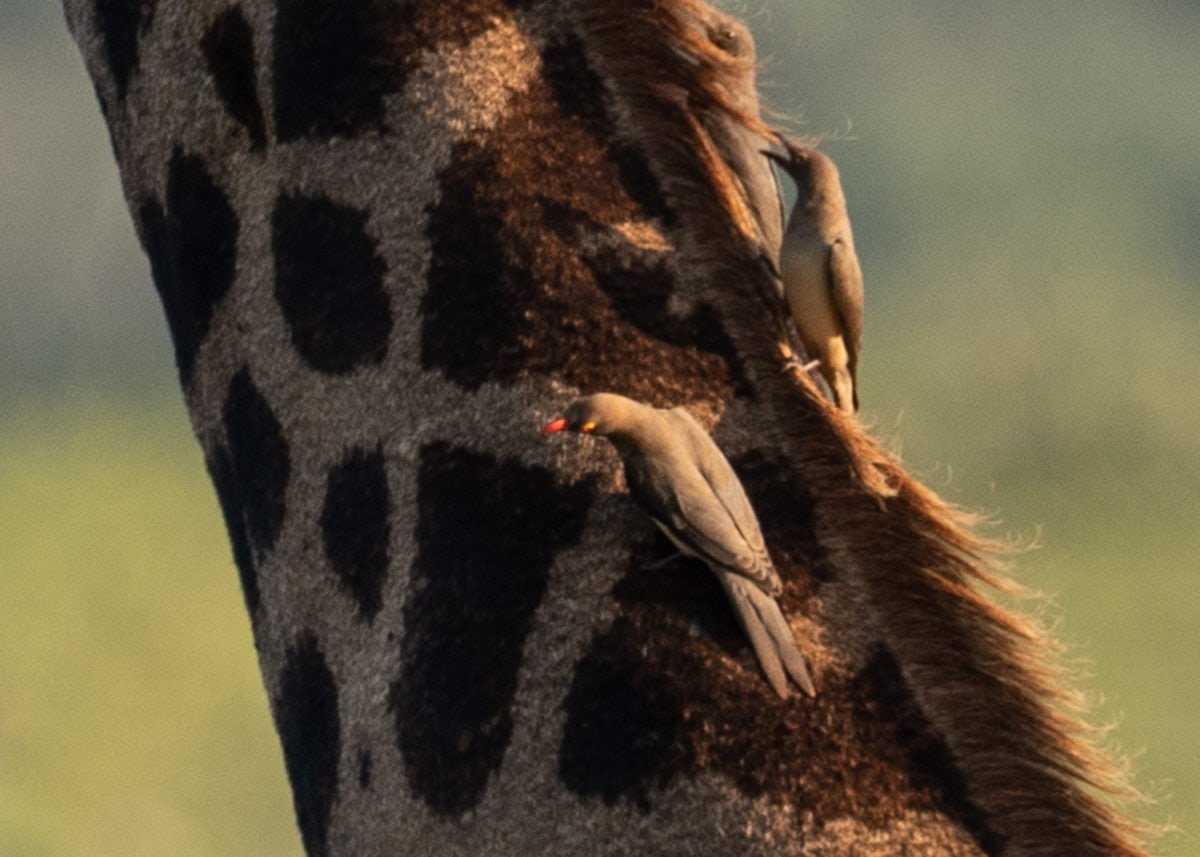
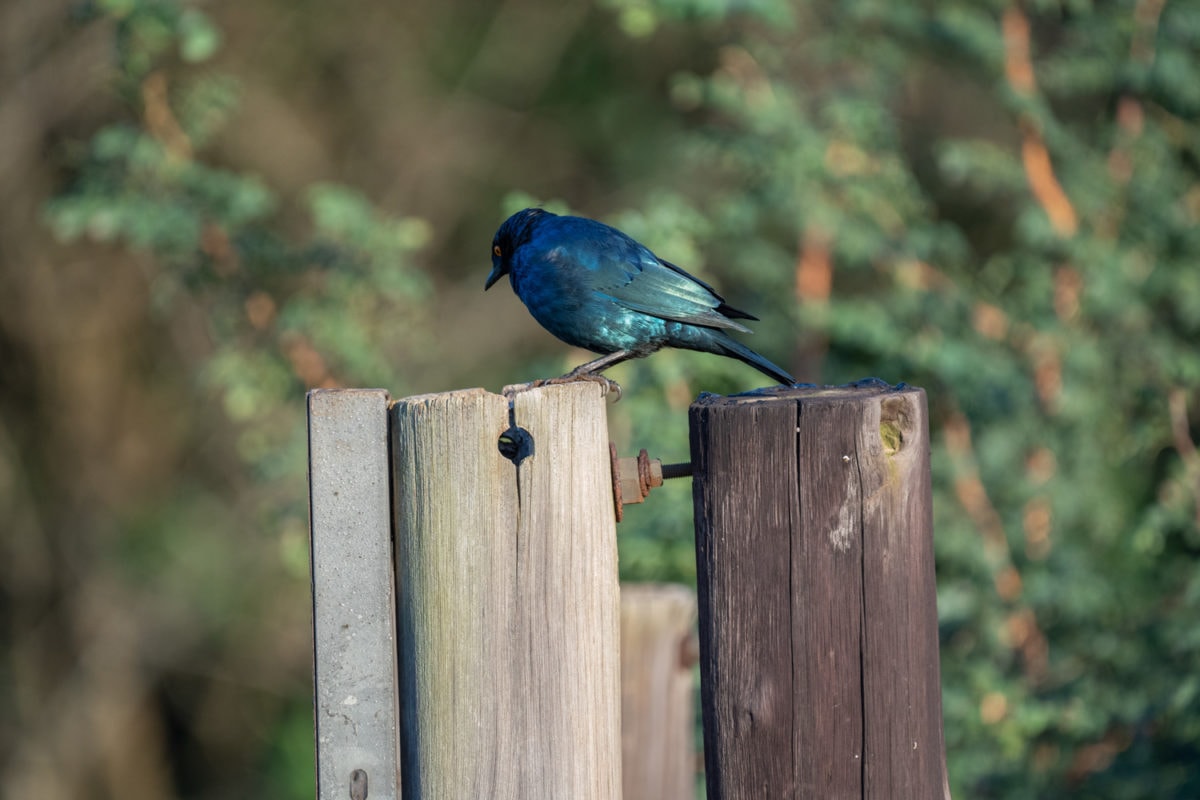
The vehicle is also equipped with chargers, wifi, an iPad, and sounds system. “What bird is that?” is a common question when on safari. It’s pretty hard to stump Christian and his expert tracker Bheki, but if you do, then Christian quickly pulls up his bird database on the iPad and within seconds we have an answer, picture, and can listen to the birdcall. Information at your fingertips in the middle of the bush – now that’s pretty impressive!
Have a Photographer Drive the Vehicle
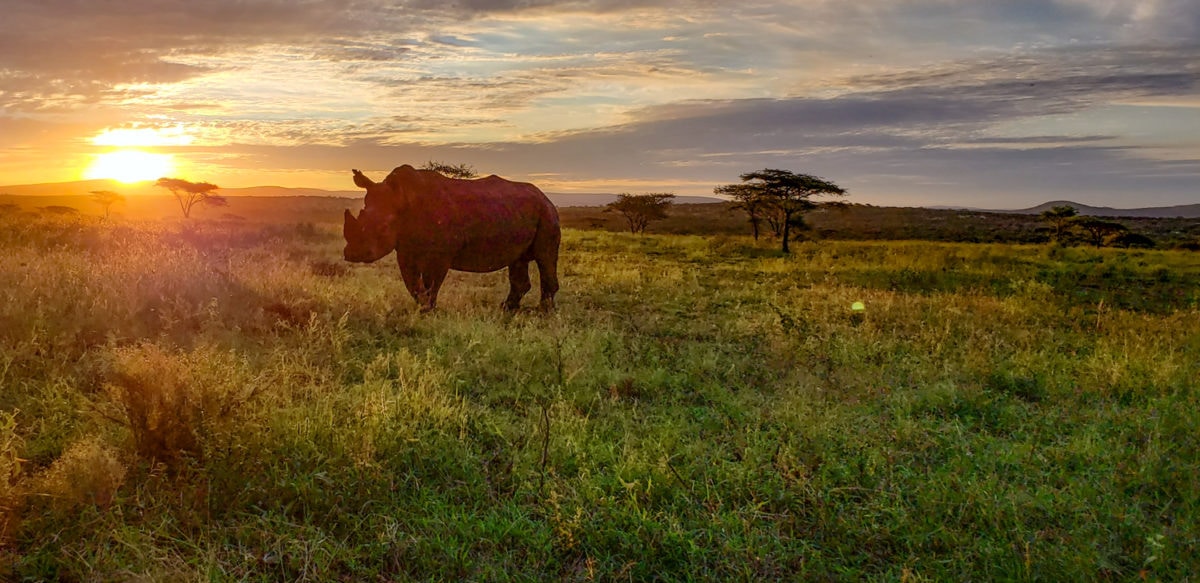
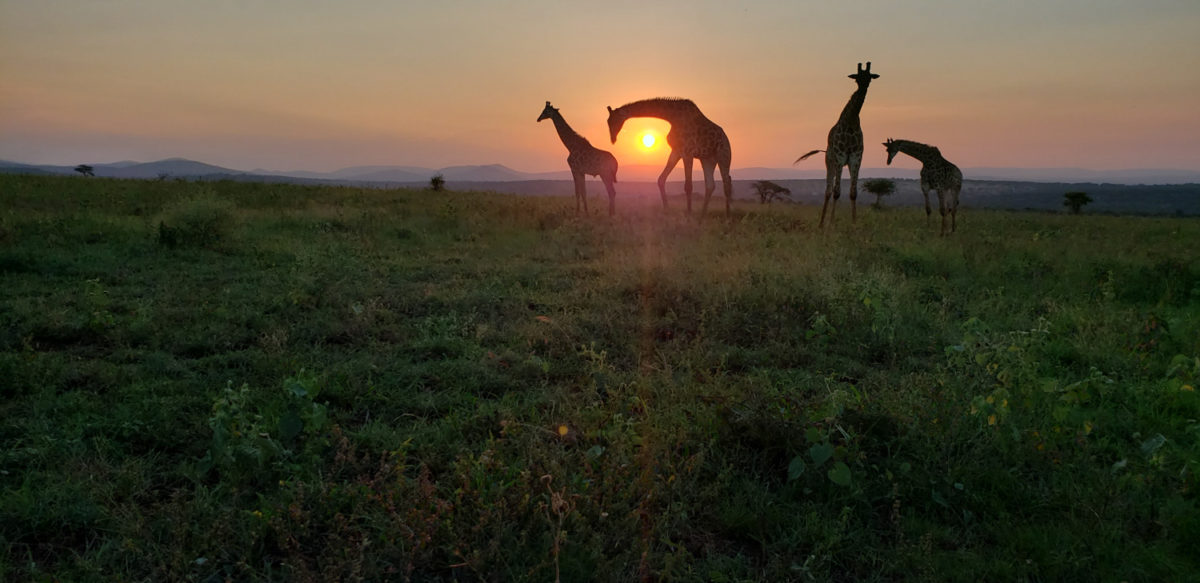
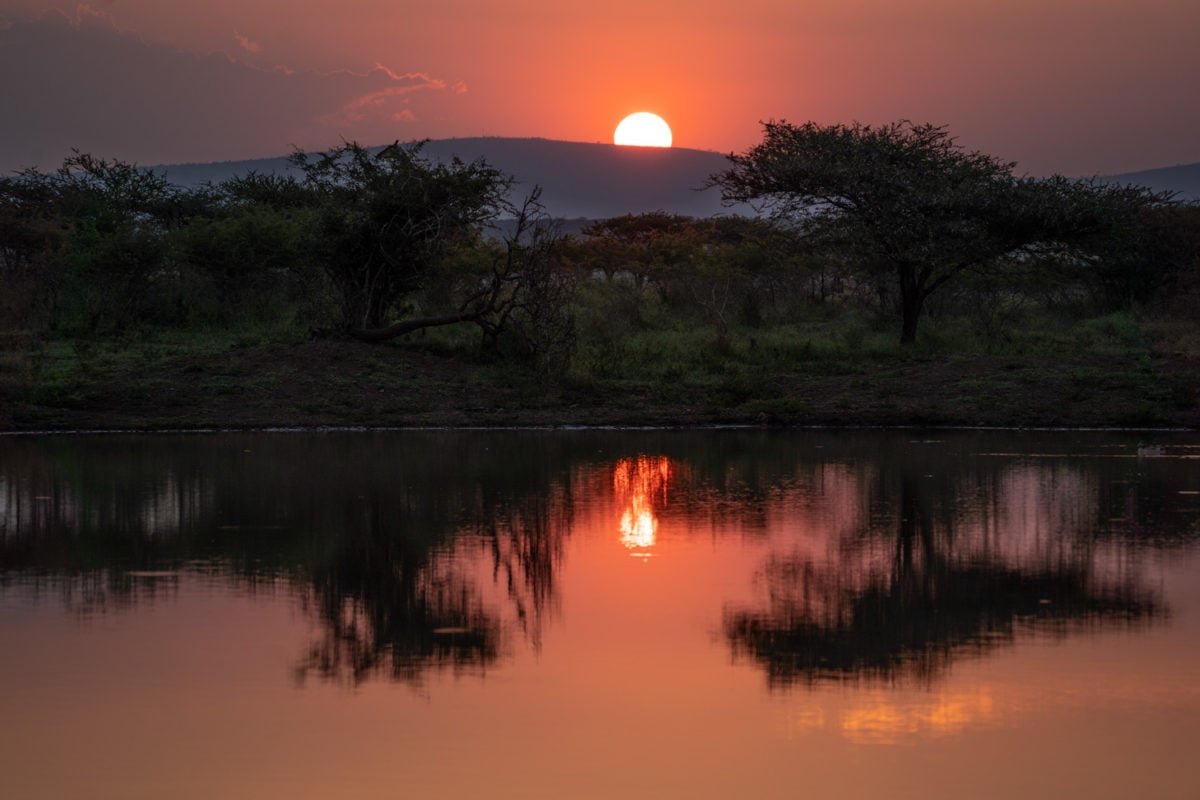
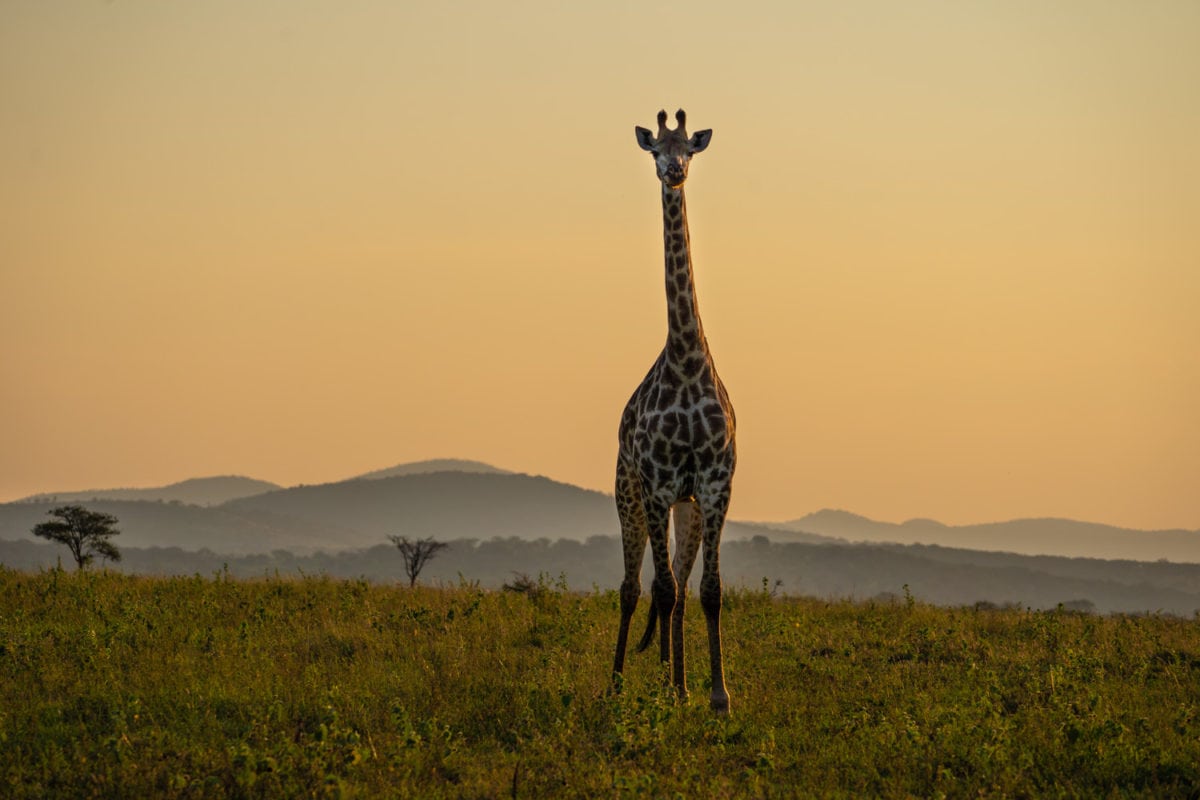
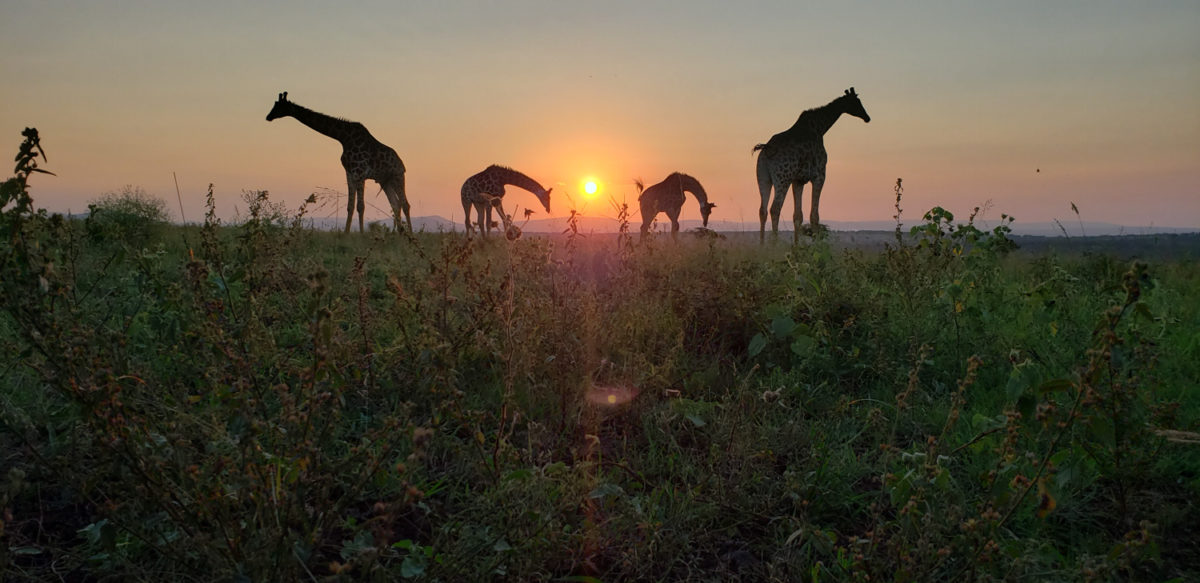
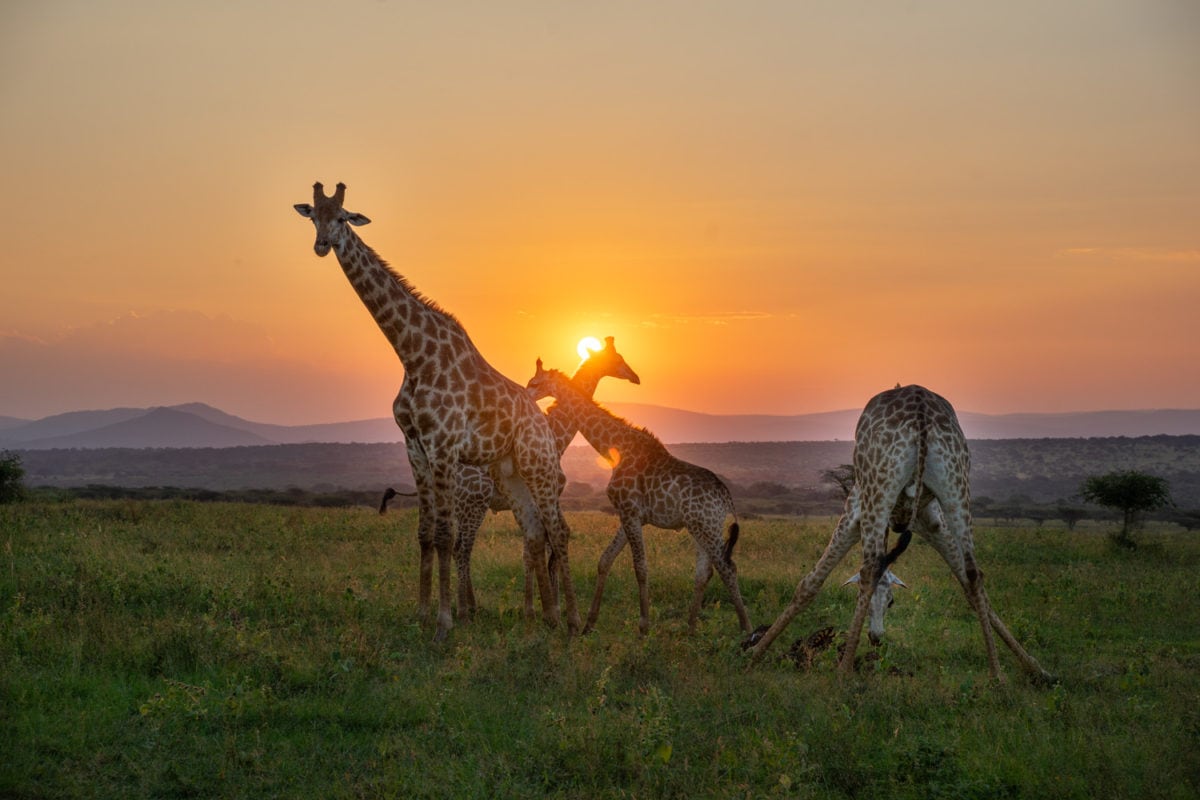
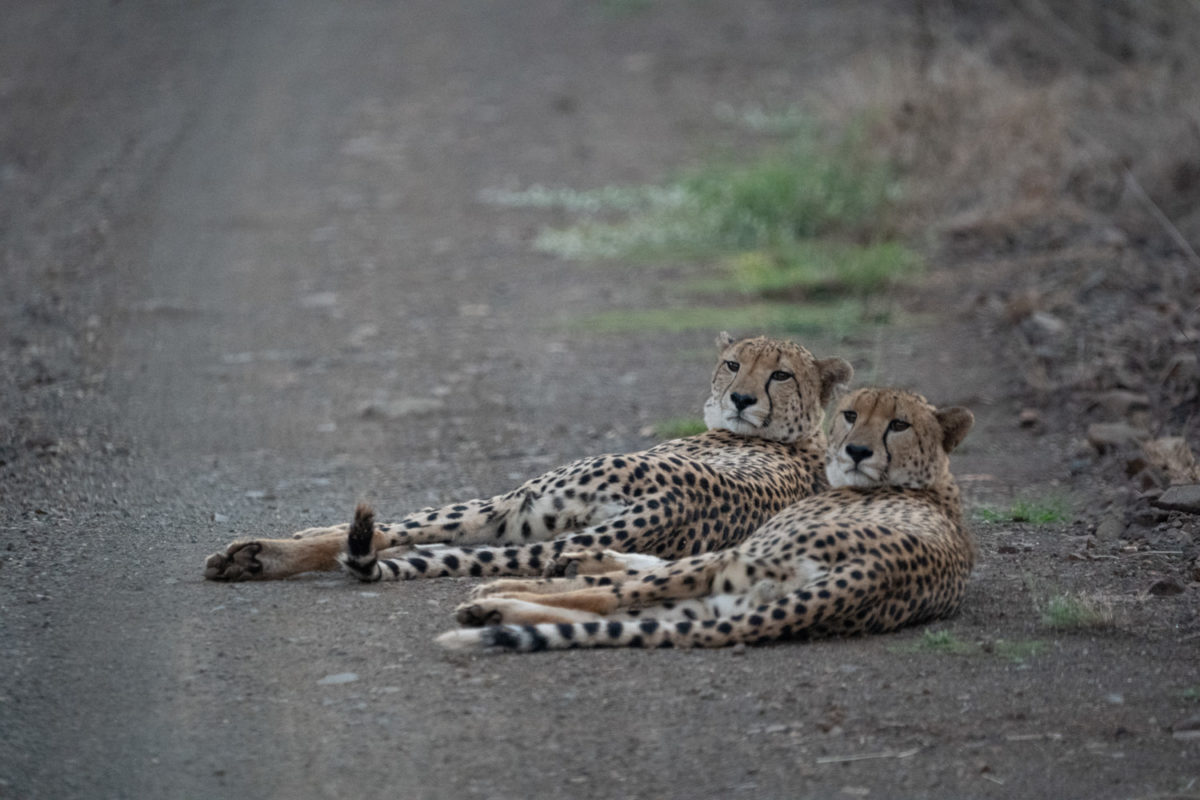
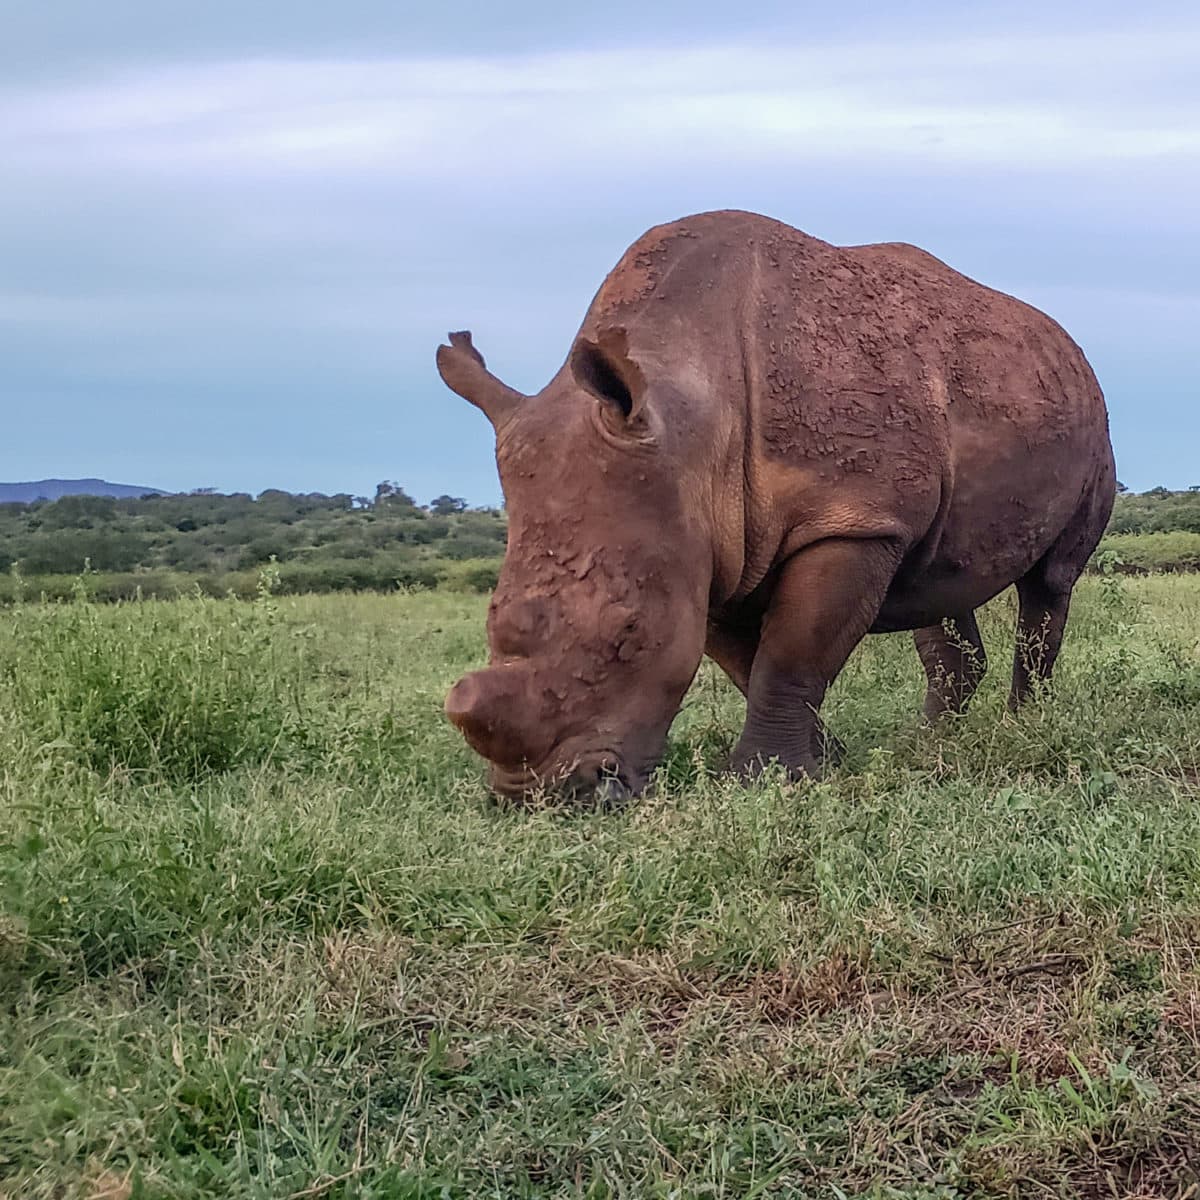
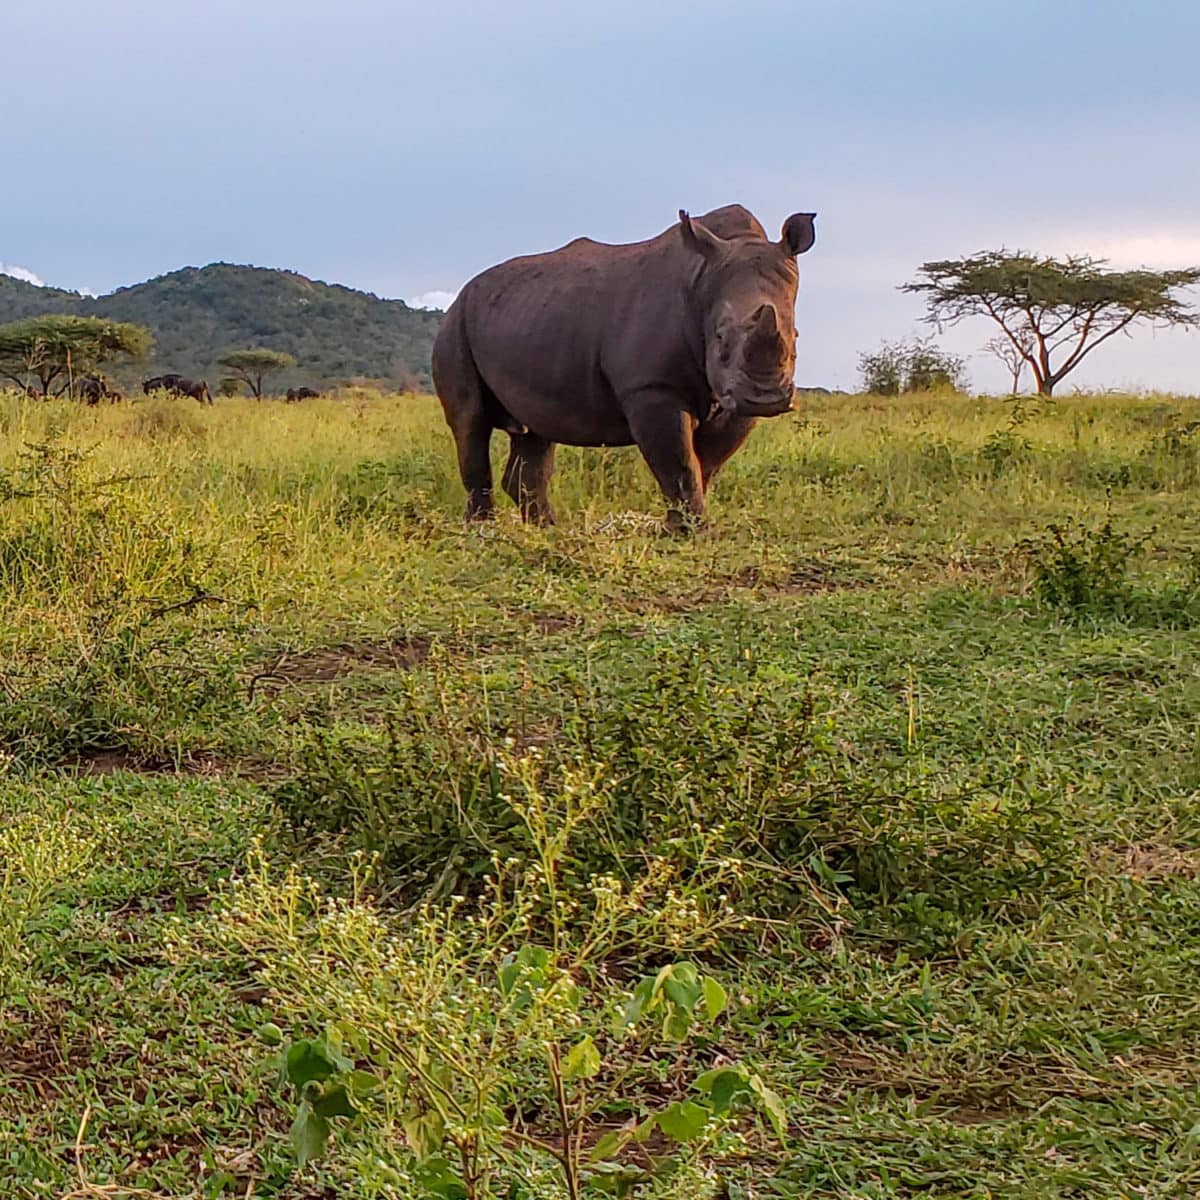
Positioning is everything when it comes to safari. Since Christian is a photographer, he understands light and composition. He will put you in the best place in relation to the animals and the sun to get the best possible shot. There were many times at sundown where we were in the perfect position to get silhouettes or just that beautiful golden hour glow. He’d help us milk every inch of the sunset racing us from the giraffe silhouette spot to the perfect lake sunset within a few seconds!

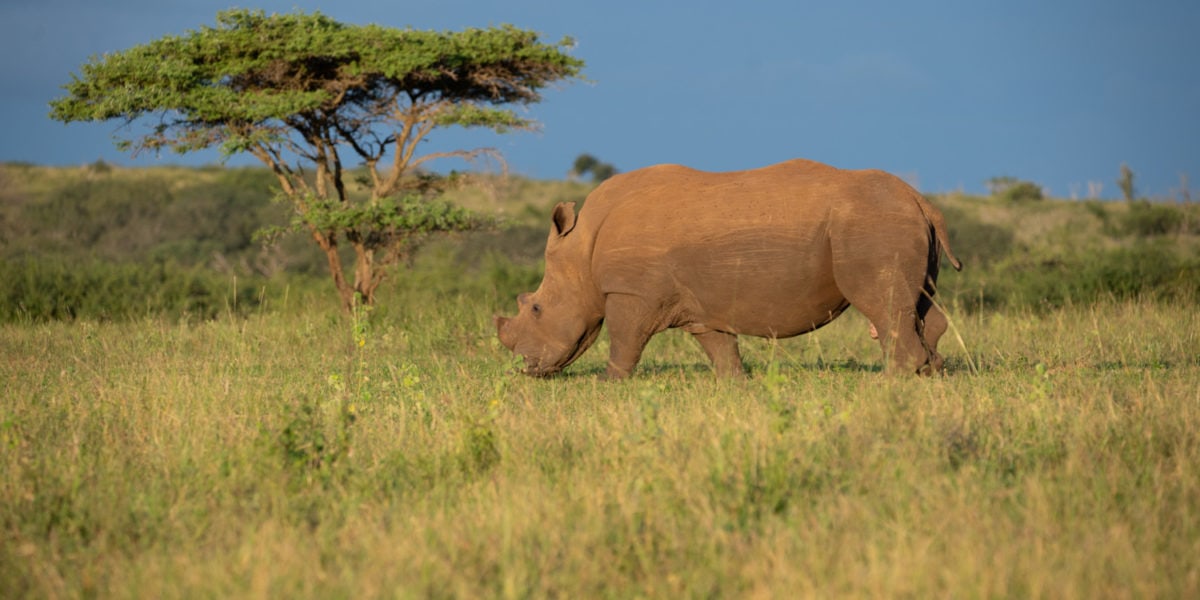
Rhino lit by the sun 
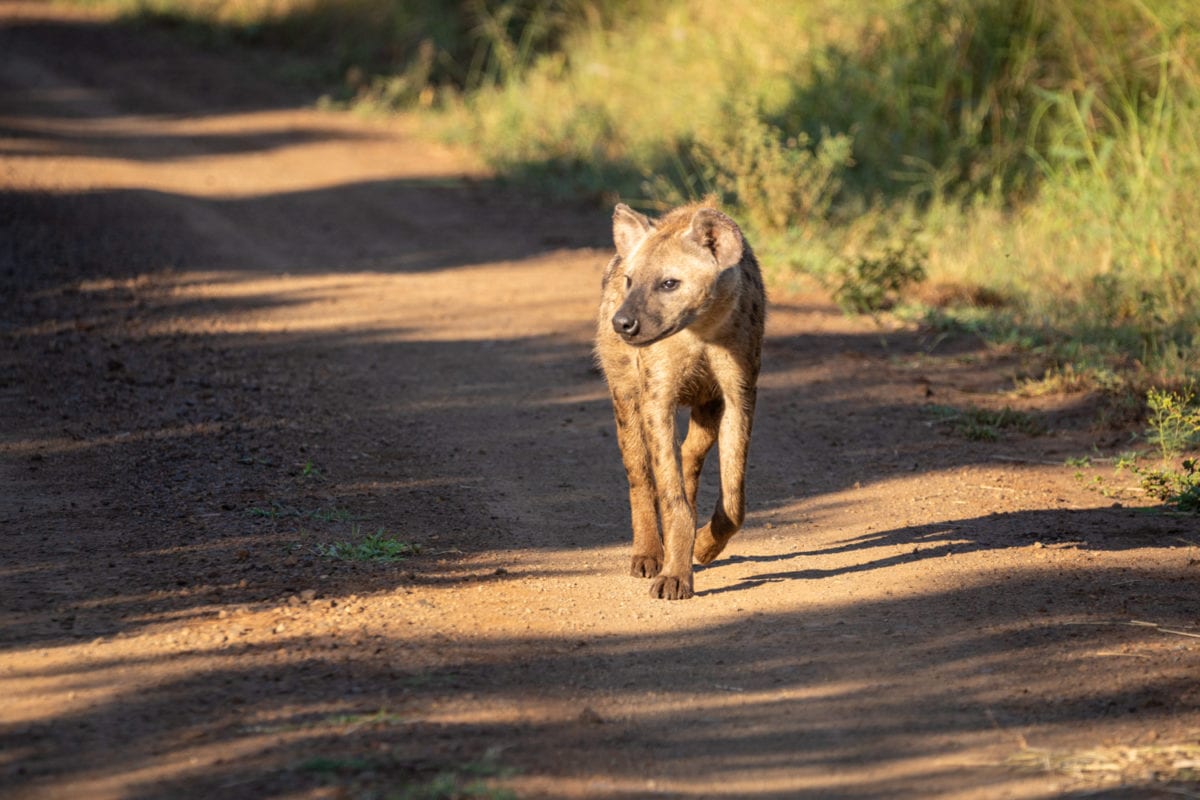
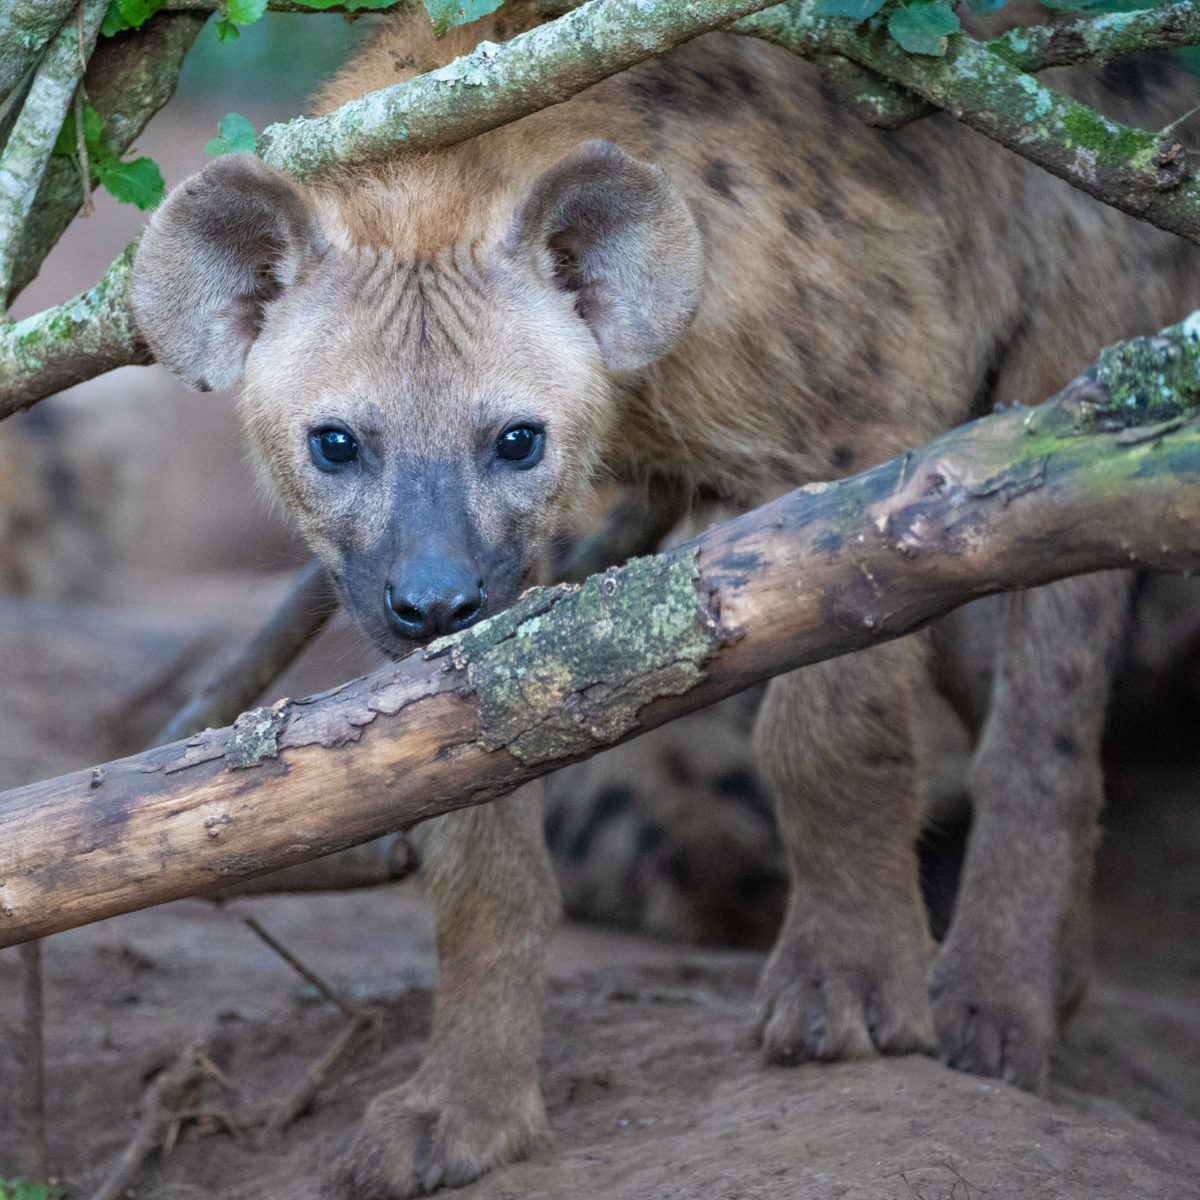
Hyena in the sunlight 
Rhino sunset Sunset silhouettes Lake sunset Golden giraffe 
Christian will take pictures of your group too!

Bonus- While you are busy taking pictures, Christian will even take pictures of you and your experience and give those images to you.
Rent the Expensive Equipment
For this trip I actually bought a new telephoto lens, but if you don’t want to make that large of an investment, you can always rent a lens for your safari. It’s a great way to try out a lens that you are considering purchasing one day.
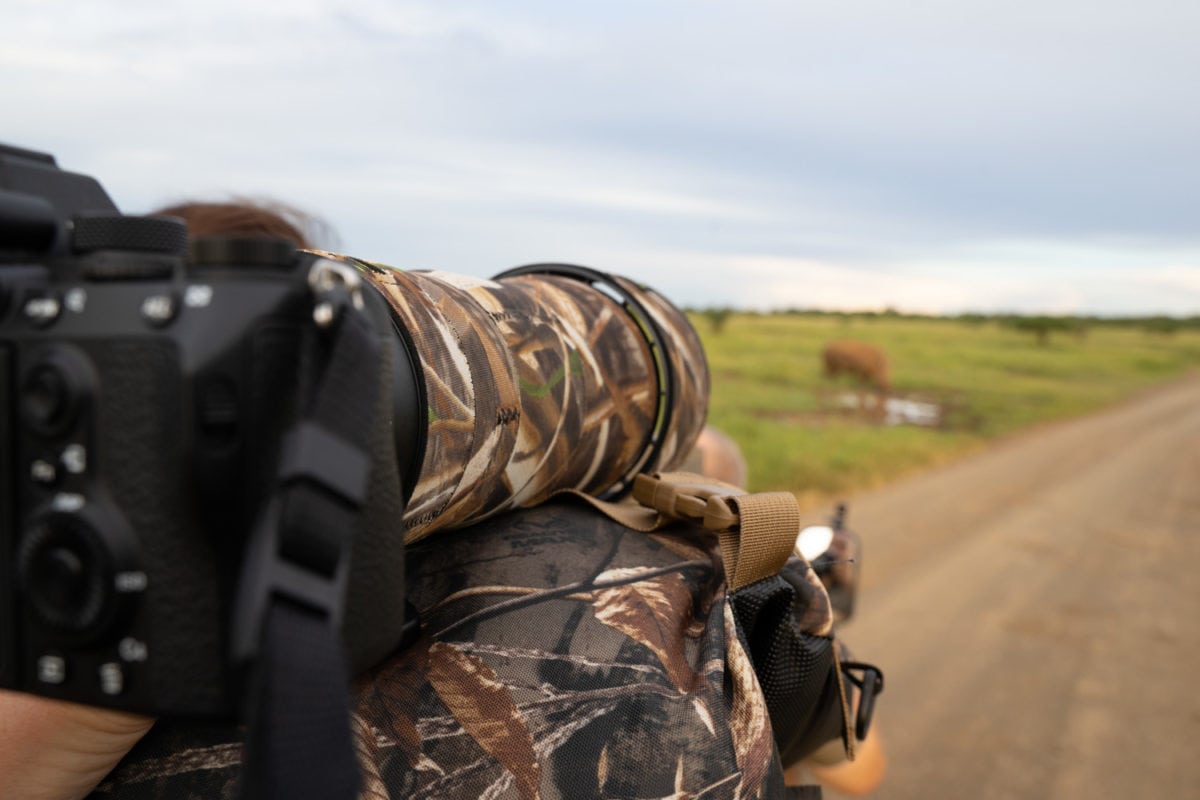
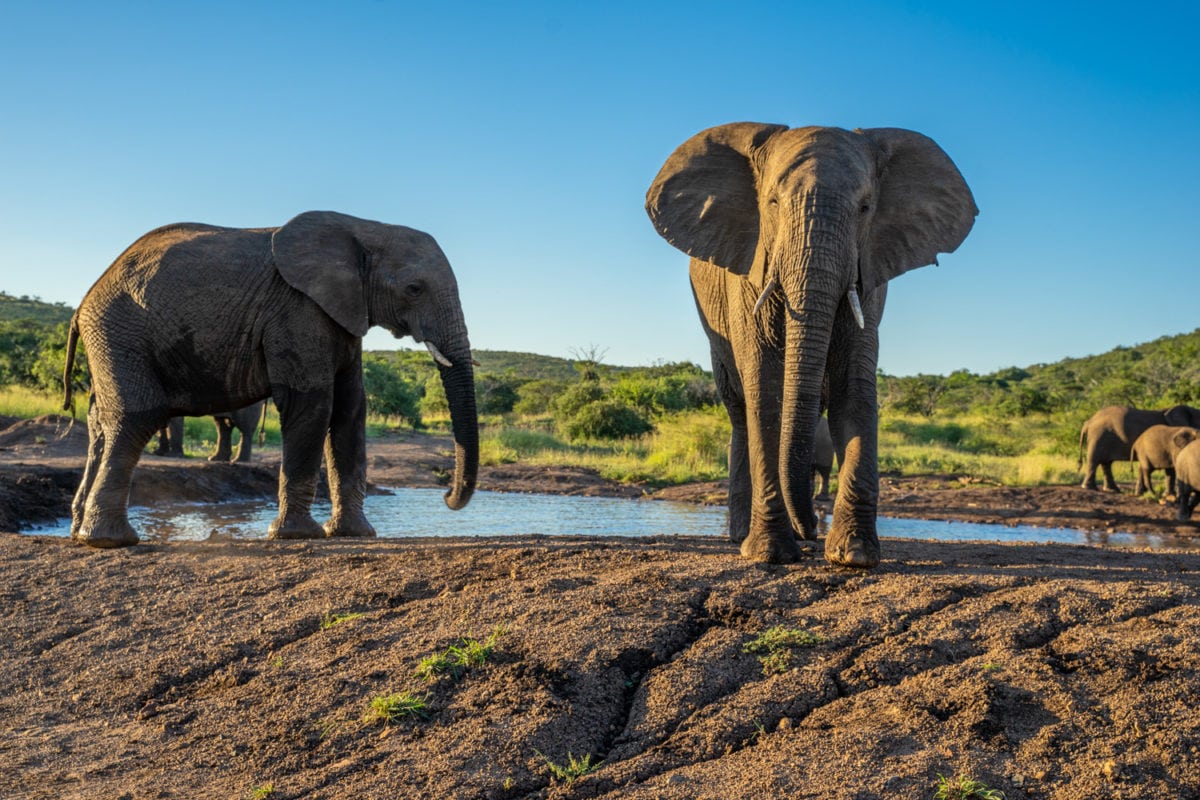
In addition to renting lenses, you can also rent camera bodies. It’s a great idea to have 2 camera bodies on safari; one with a telephoto lens and one with a wide angle so that you have both focal lengths and don’t have to change lenses in the dusty environment. Safari action happens quickly and you don’t often have the time to switch lenses before the subject is gone! Plus, I found many times when I had my telephoto lens and then the animals got too close to use it and needed to quickly switch to my other camera to get the wider angle as the rhinos moved closer and closer!
If you’ve never used a big telephoto lens before, then read this first!
Yes – You Can Use a Phone Camera on Safari
Another option for wider angle shooting is using your phone. Christian was a big advocate of phone photography which surprised me at first, but then I saw some of the images he was able to capture with his phone and I quickly understood why it was so useful for safari photography. He will take you through a great tutorial on how to use your phone and lock focus for safari photography as part of his tutorial for each guest.
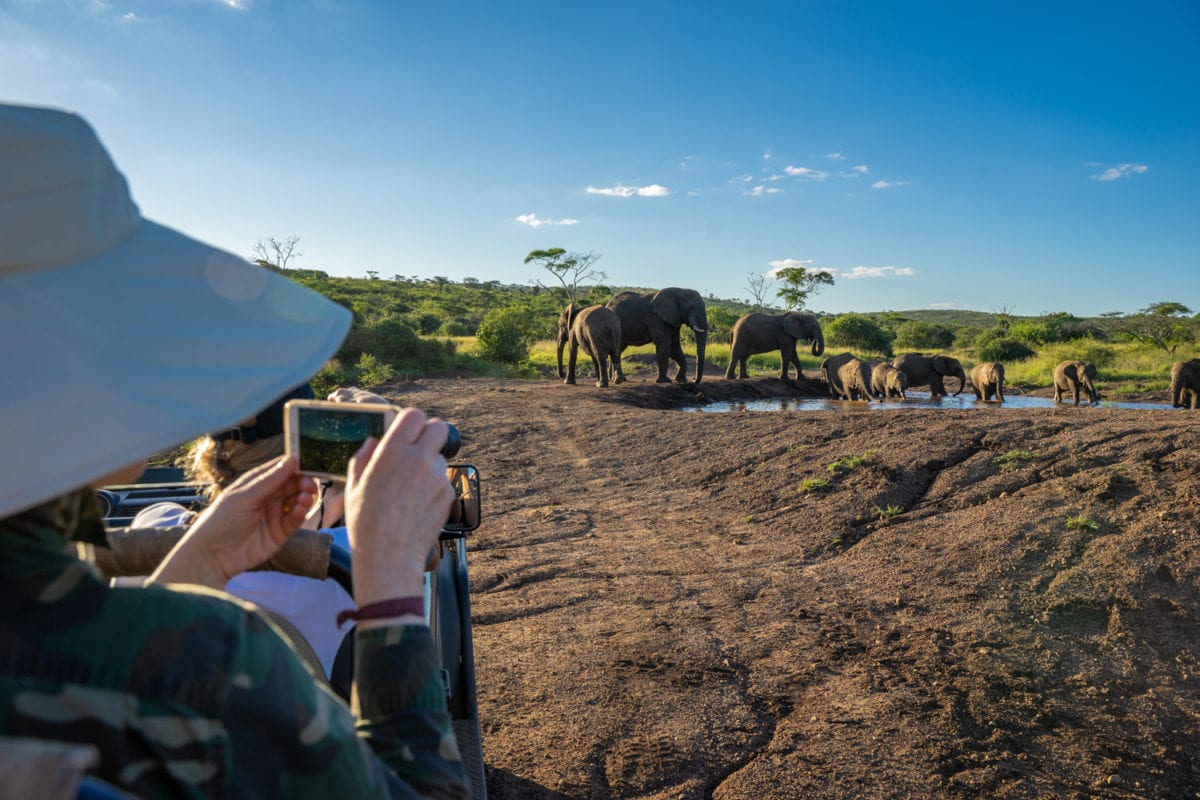
In addition, with the help of a selfie stick, you are able to get some incredible perspectives on the animals when you place the camera nearly on the ground outside the vehicle. One things that Christian will remind you of all the time is to get to eye level with the animals, and this allows you to do so. These were some of my favorite shots and something that I couldn’t really do with my DSLR.
Frame Your Shot With Extra Space Around the Animal
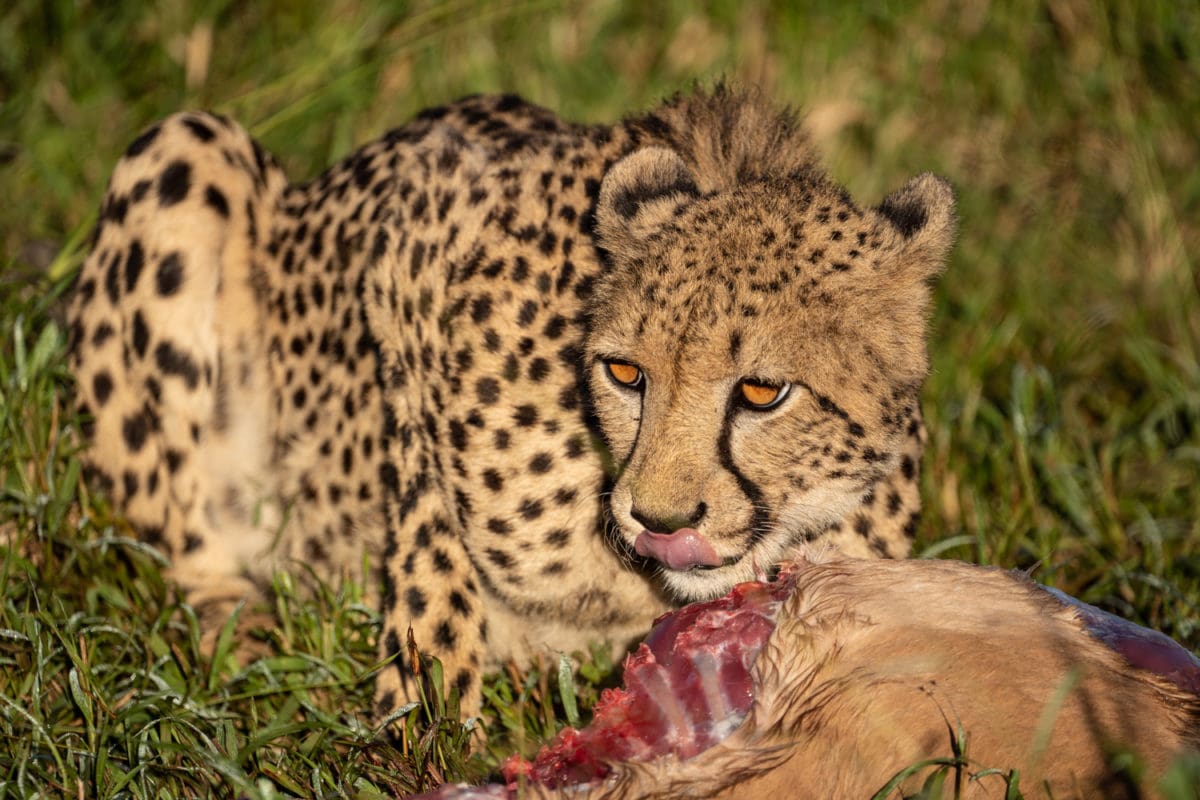
Looking through the eyepiece you see just the shot you want perfectly framed, however right when you press the shutter, the animal moves a bit and suddenly your framing is ruined as the animals feet or ears are cut off. You’ll want to give yourself leeway of extra space around your object in the frame; often animals will move out of your frame pretty quickly. Nothing is more annoying than a great shot with the feet cut off. I was guilty of this quite often on my first safari. When I look back at the pictures that I thought were the best from that safari 13 years ago, I now see that most of the time I was cutting off animals in the frame.

Image from 2006 – cutting off his paws! Image from 2006 – cutting off it’s tail! Image from 2006 cutting off their legs

Camera Settings for Safaris
I tended to set my focus on center point focus and use aperture priority for wildlife photography. I would set a big aperture (low number) so that I could get that great depth of field in the background. For animals that were moving I’d use my AF-C continuous focus and for sleeping or slow animals I’d simply use my AF-S one shot. Christian will go over all of this with you and give you a ‘cheat sheet’ for typical camera settings for safari photography.
Don’t Spook the Wildlife! Use Silent Mode When on Safari
If your camera can go into complete stealth mode and shoot with absolutely no sound, then use it for your safari photography. It means less chance that you will disturb the animal.
Photography Gear I Used on Safari
I went all out for this safari and actually bought some new equipment. In addition to this safari I’ll be using this new equipment for more wildlife photography in the Arctic and in BC Canada this year too. It made more sense for me to buy rather than rent for 3 trips this year.
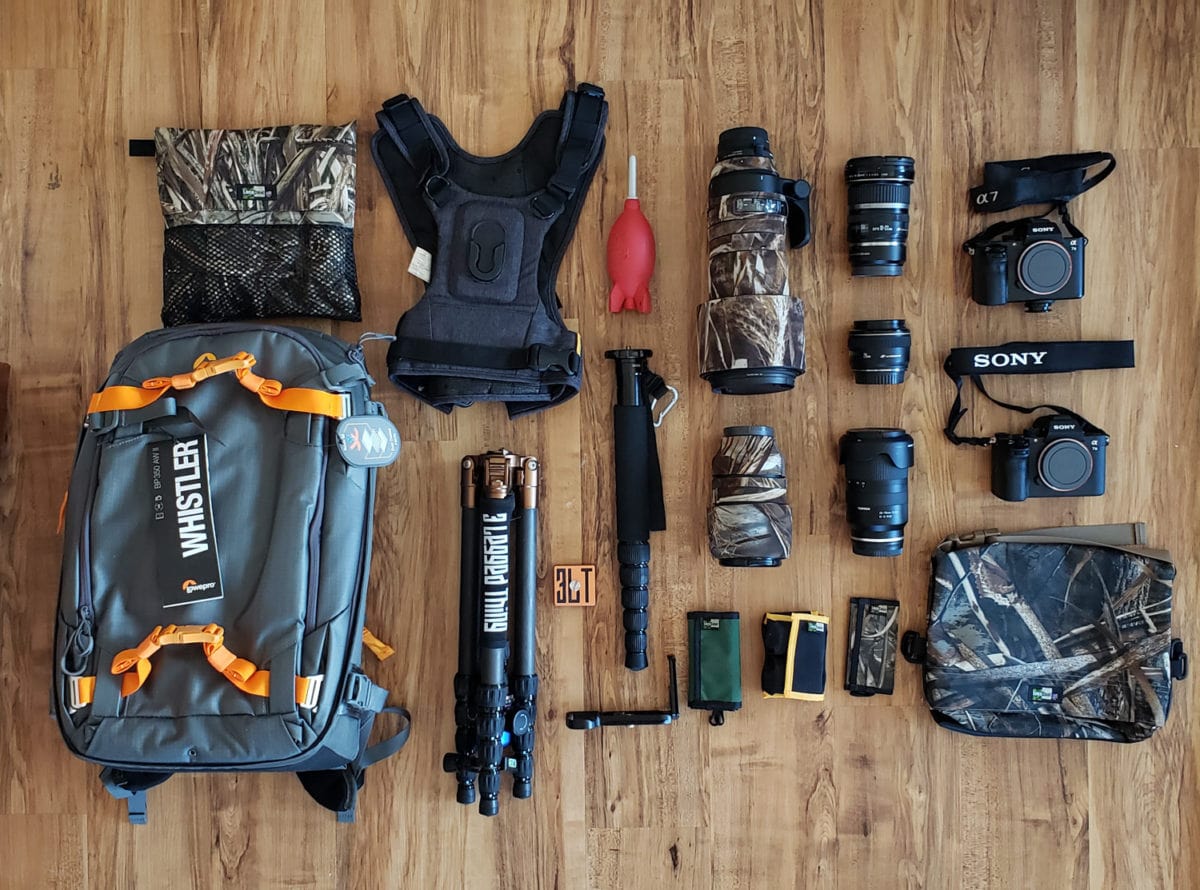
Cameras
I switched from Canon to a Sony mirrorless system a couple of year ago. I got a Sony A7ii and I had more than a few issues with it. However, since I had bought Sony lenses, I decided to stick with Sony and try the A7iii when it came out. Interestingly enough, Sony had made a number of changes – really good ones that solved the problems I had with the A7ii. Plus, the focusing and ability to work with non-Sony lenses with an adapter were greatly improved.
I took my new Sony A7iii, and my older A7ii so that I didn’t have to change lenses in the bush. I also had my Samsung Galaxy S9+ for phone images and video.
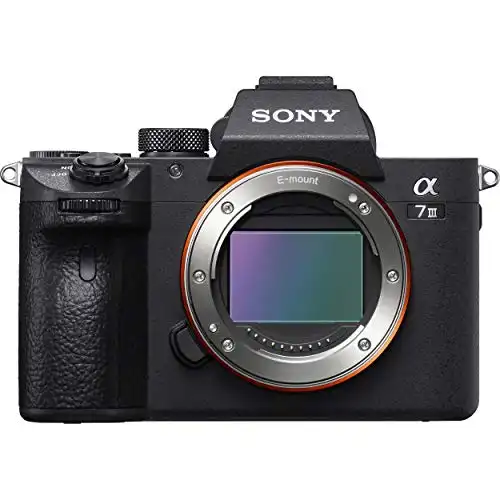
Sony a7 III Full-Frame Mirrorless Interchangeable-Lens Camera Optical with 3-Inch LCD, Black
See my Amazon photo store for all of my favorite photo gear I travel with!
Lenses
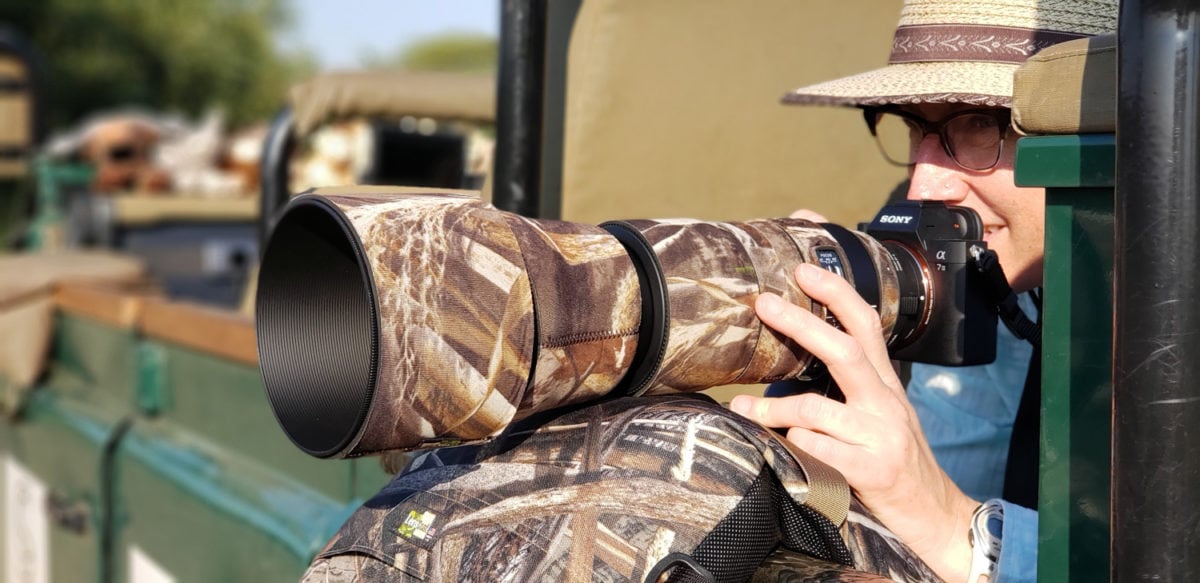
I invested in a new wildlife telephoto lens for this trip and I was really happy with it! I went with the Sigma 150-600mm 5-6.3 and an adapter for my Sony. It worked great with the Sony focus system and I absolutely loved this lens. Coming in at under $1000, it’s cheaper than getting a Sony lens!
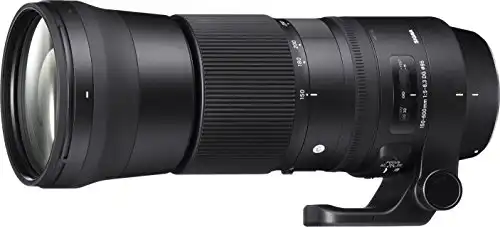
Sigma 150-600mm 5-6.3 Contemporary DG OS HSM Lens for Nikon I use an adapter to use with my Sony A7iii
Granted – it’s hard to get used to carrying and operating a telephoto lens, but I was able to get some great shots thanks to this lens!
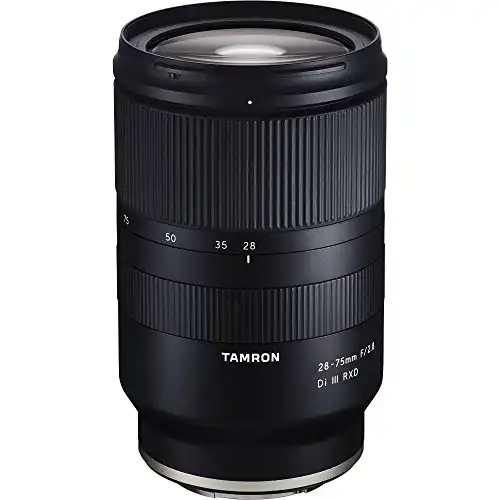
In addition, I bought a new every day lens by Tamron 28-75mm F2.8. I really wanted something that focused fast and had a low F-stop. So far I’m loving the results – it’s my first Tamron!
I also brought a wide angle lens for landscapes and room photography. I am still using my Canon 10-25mm with an adapter for that. It works fine for now until I have enough to invest in another Tamron lens like this one! Tamron 17-28mm F2.8 .
Cotton Carrier
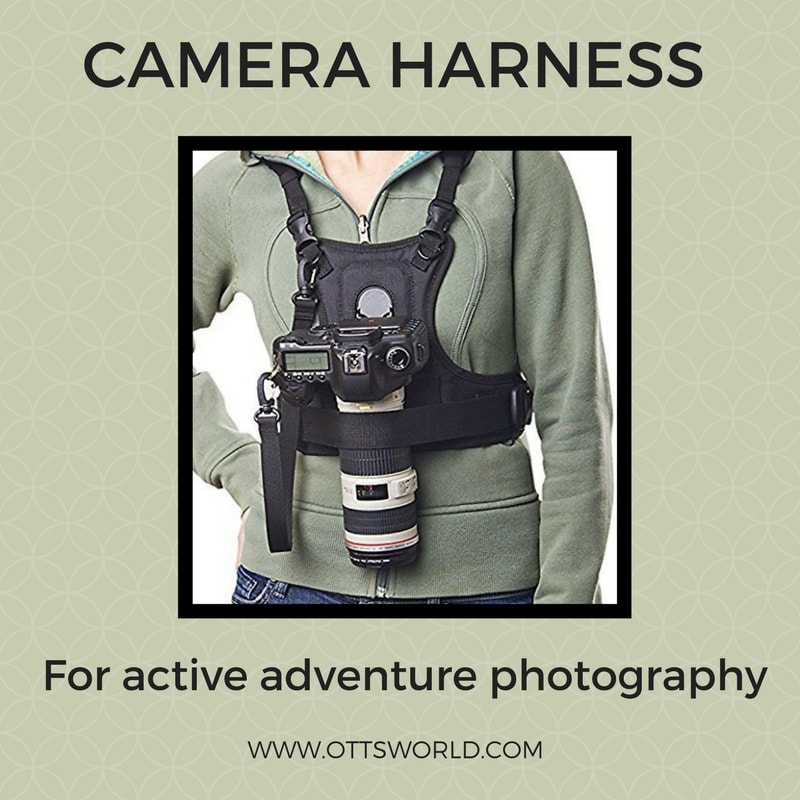
I adore my Cotton Carrier G3 harness – it’s perfect for a walking safari . It’s easy to quickly pull out of the chest lock and use the camera in one smooth motion. But the best part is that the harness is dispersing the weight properly instead of around your neck only. All straps are adjustable. This is a must for any outdoor photographer; I use it hiking all the time. It also comes with a little rain cover.
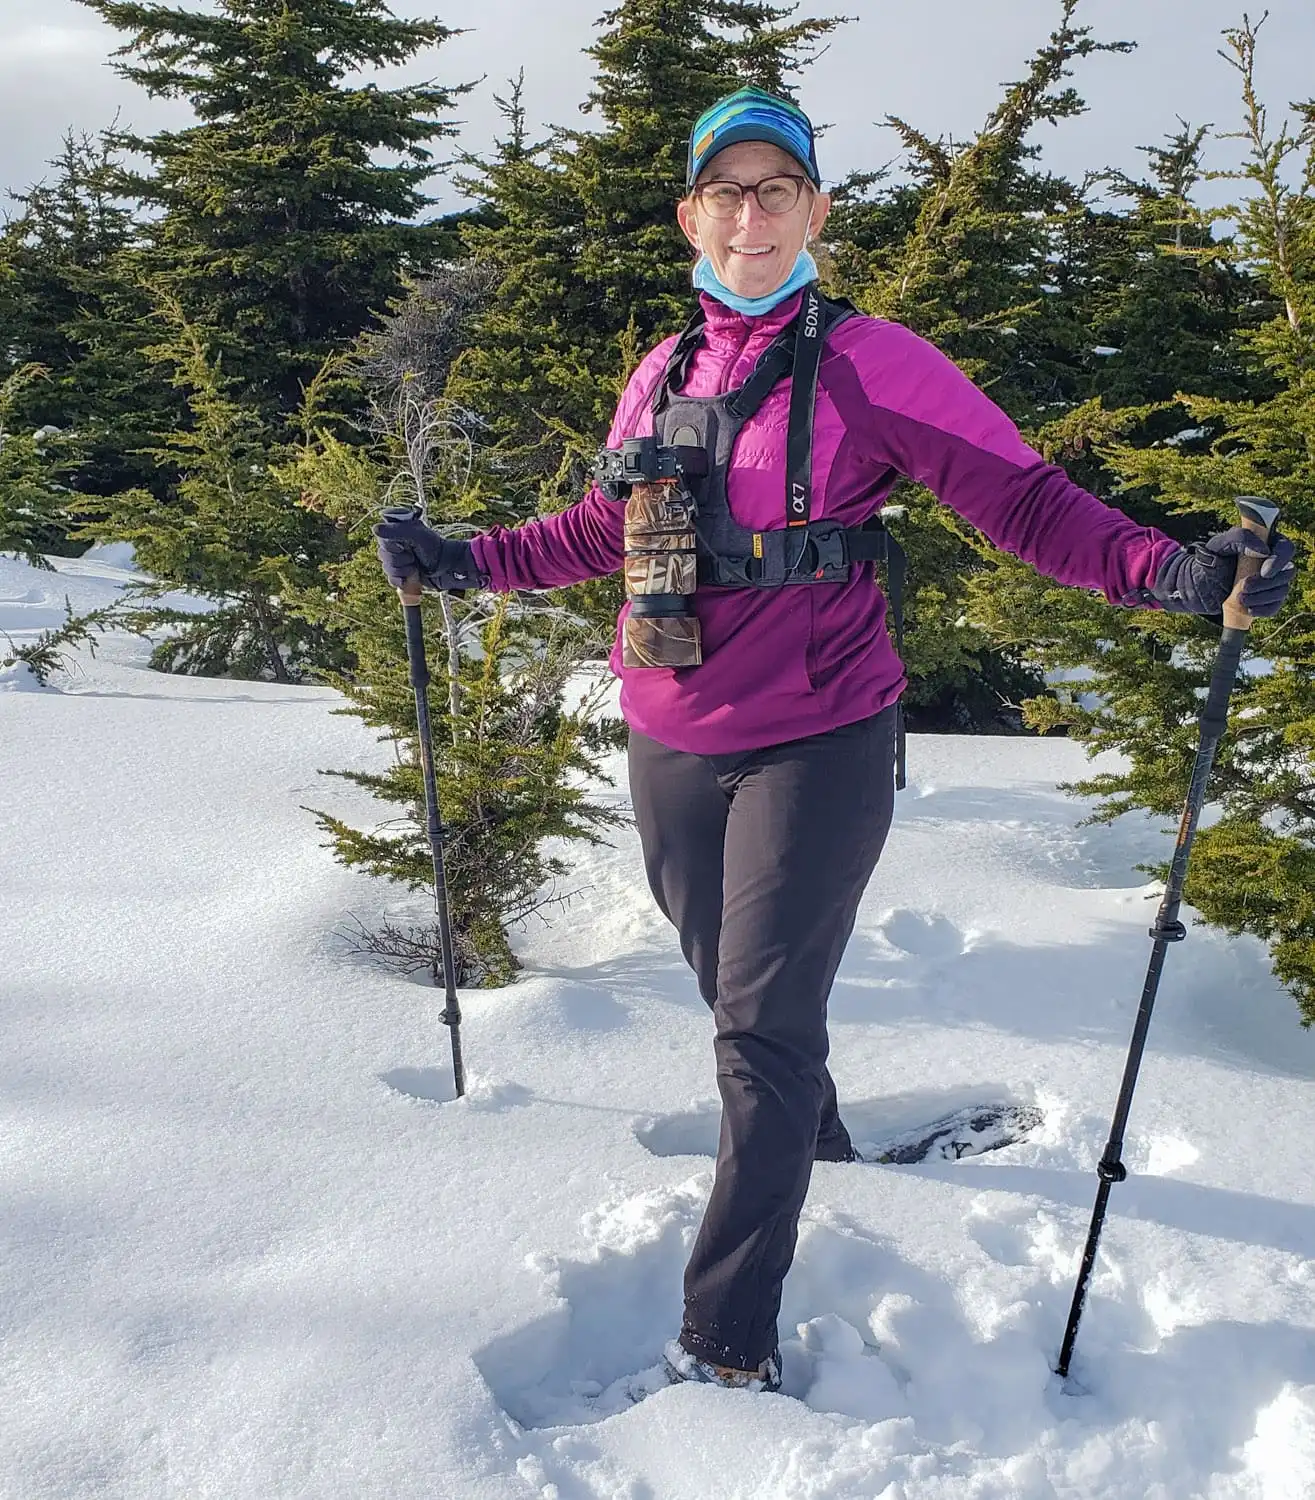
I don't go on a trip without this harness! It allows me to be hands free when hiking and snowshoeing. I've also used it while horseback riding. It has saved my neck and back and it a secure, healthy way to carry my camera!
10% off coupon code for readers - OTTSWORLD
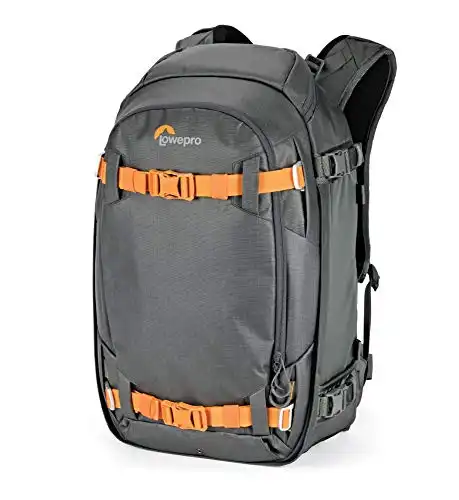
Lowepro Whistler Backpack
I normally use a Lowepro Photosport 300 for photo trips; however, with all of this new equipment and bigger lenses, I knew I needed a different and better solution for my photo backpack. I stuck with Lowepro because I really do love their bags. I chose the Lowepro Whistler 350 AWII and it was just the right size to fit everything!
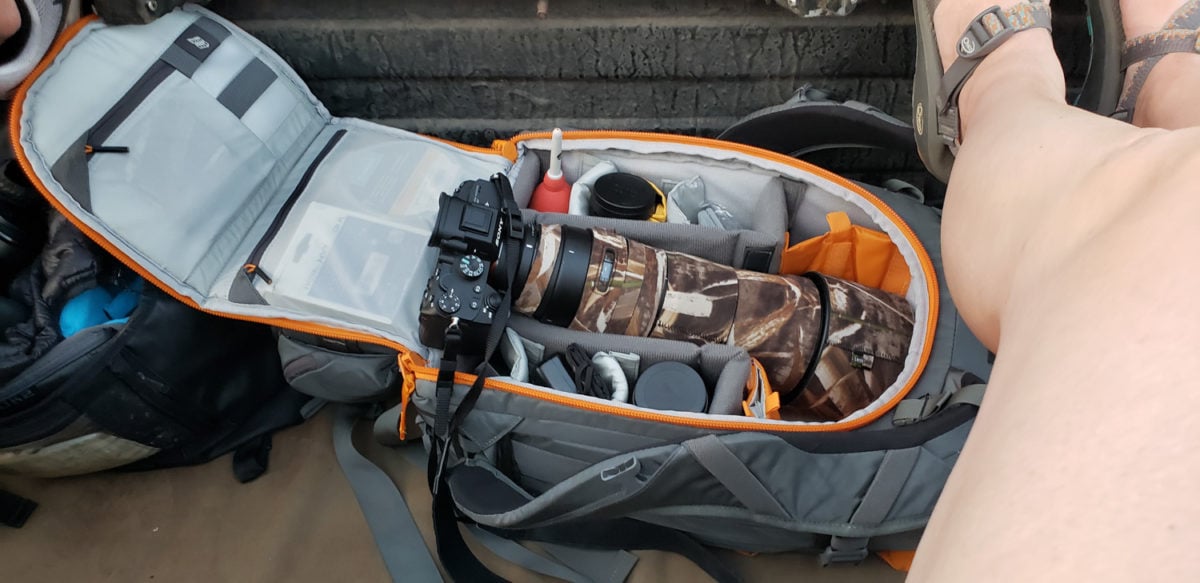
Because I do so much hiking I always look for a bag that is equal parts photography backpack and hiking backpack. From a hiking perspective I always need room for a water bladder, rain gear, first aid kit, and snacks. I also need a really substantial waist-belt for distributing the weight properly. For photography I need to carry a number of lenses tripod, and a couple of camera bodies.
It’s a lot to ask of a backpack to be both, but I feel that the Lowepro Whistler does a good job. I really loved that the tripod fit easily on the outside of the pack (in a number of different configurations) and that you are able to take a water bladder and still protect your equipment from liquids with a waterproof barrier in between the two sections. It also comes with a rain cover. It’s a great camera bag for travel with a photography focus!
The Whistler 350 AWII was a great solution for me for wildlife photography when I carry more gear!
A true, all-season and versatile pack, the Whistler BP 450 AW delivers amazing performance for wilderness photographers and adventurers.
Lens Protection
When you are in the safari environment, the amount of dust surrounding you is incredible! I used LensCoat lenscovers to protect my new lenses from the elements. Lenses are a big investment so you want to protect them as much as you can from the dust, water, and sand. In addition, LensCoat comes in various camo designs so that you can shoot in any season and also camouflage yourself better when trying to go unnoticed by the wildlife.

LensCoat® lens covers offers your valuable equipment some protection from scrapes and bumps, preserving its resale value. It also help break up the shape of your lens, making it less noticeable to wildlife.
Lenscoat covers practically any lens you have. Just go to the website and look for your lenses and choose a design.
Rain Protection

I also took my LensCoat RainCoat too in case we were caught in a rainstorm. It’s small to pack in your backpack and worth it if it means protecting your expensive gear! This also comes in various sizes and configurations depending on your telephoto lens.

Don't let the weather stop your photography! This innovative cover provides protection for your camera and lens from the elements like rain, snow, salt spray, dirt, sand and dust while allowing you easy access to the camera and lens controls.
Bean Bag
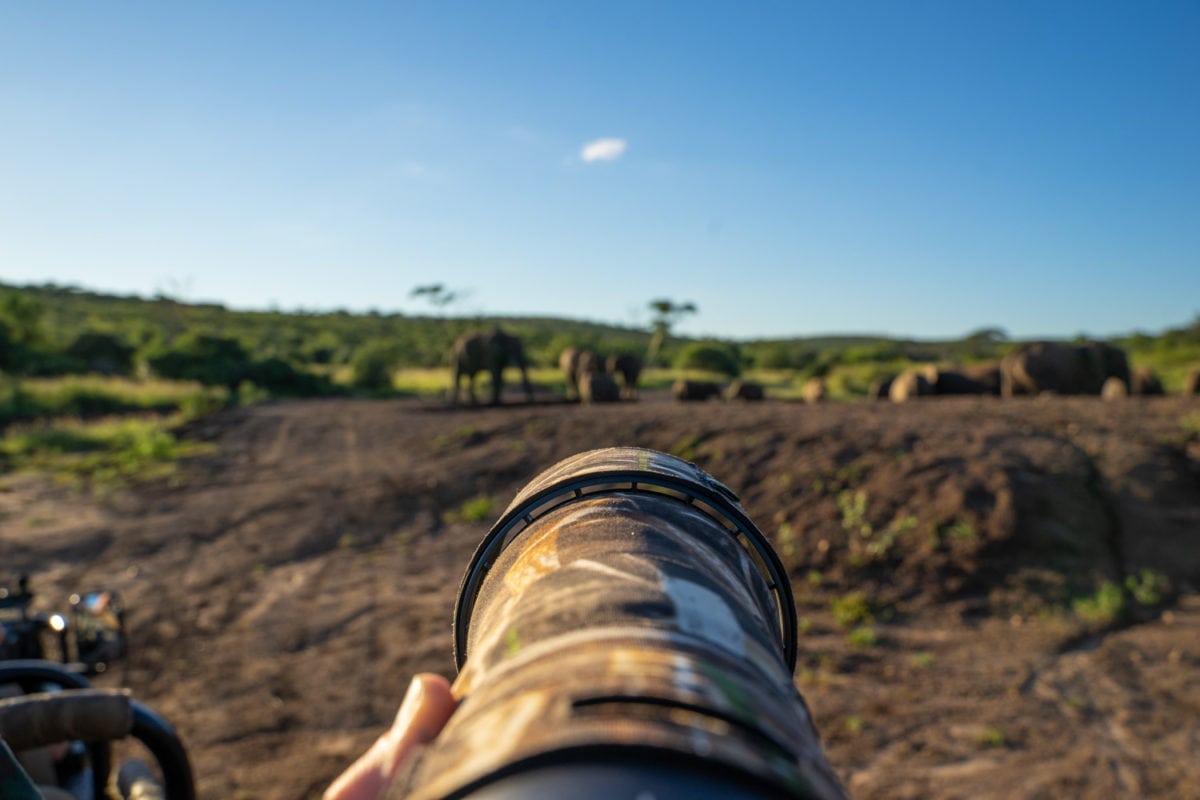
LensCoat also makes a LensSack product which provides a non-slip support platform stabilizing your gear on any surface. This is how I could stably shoot out of the vehicle by creating a surface to safely rest my camera on the car. When shooting with a big telephoto lens, this really is a must.
In addition, it’s easy to travel with because when it’s empty you can fold it up really small and then you can fill it with sand, dirt, rice, or birdseed to give it that soft surface. I used rice while on safari.
Selfie Stick
Before you say “ewwwww”, you should know that I got this picture with my selfie stick with a blue tooth
Christian taught us this else I might not have ever thought of it. He suggests to hang your phone camera over the side of the jeep with a selfie stick so that you can get ground level photos of the animals for a completely different perspective. Make sure you have a selfie stick that has a blue tooth clicker while your phone hangs off the side of the vehicle.
I used this Yoozon one that also can be used as a small tripod
Rocket Blower
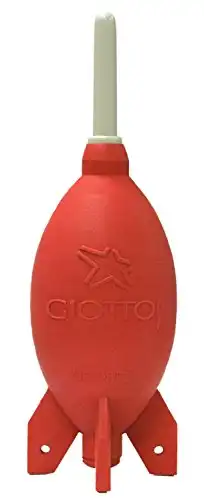
Not only does it look cute, but a Rocket Blaster one of the most important things in my camera bag. Ever found yourself in a dessert sand storm, dusty field, or wind storm while trying to change lenses? Keep your camera sensor clean safely by using this simple air blaster. Plus, it’s small and ‘squishable’ so it easily fits into your camera bag!
Follow my Travels
Thanks to Christian’s tips, his Green Mamba photography vehicle, and my new equipment, I was able to greatly improve my safari photography from my first safari I took 12 years ago.
See for yourself!


By Karen August 10, 2019 - 7:35 pm
I absolutely loved following your safari trip on your insta-stories. These photos are amazing. It is a dream of mine to go on safari and take photos. I really appreciate you taking the time to put all of this information together.
By Markus August 16, 2019 - 7:33 am
Amazing captures…feels so close to nature. Loved it!
By Simon August 19, 2019 - 3:34 am
Oh! I love wildlife…really enjoyed reading it throughout.
By Roslia Santamaria August 27, 2019 - 2:14 am
Thanks for sharing this amazing post.
By mahi sultan August 28, 2019 - 5:19 am
Your photos are just Amazing.thanks for sharing the tips.and also thank you for this amazing and informative post.
By Brian G September 4, 2019 - 8:28 pm
Really enjoyed your post. Makes me feel like buying another DSLR and start taking photos again. Amazing photos and great tips.
By Tanzania safari April 14, 2021 - 8:40 am
You have a nice blog with great post, Thanks for sharing!